★ ELDORIA POWER ★ OFFICIAL PLAYER'S GUIDE ★
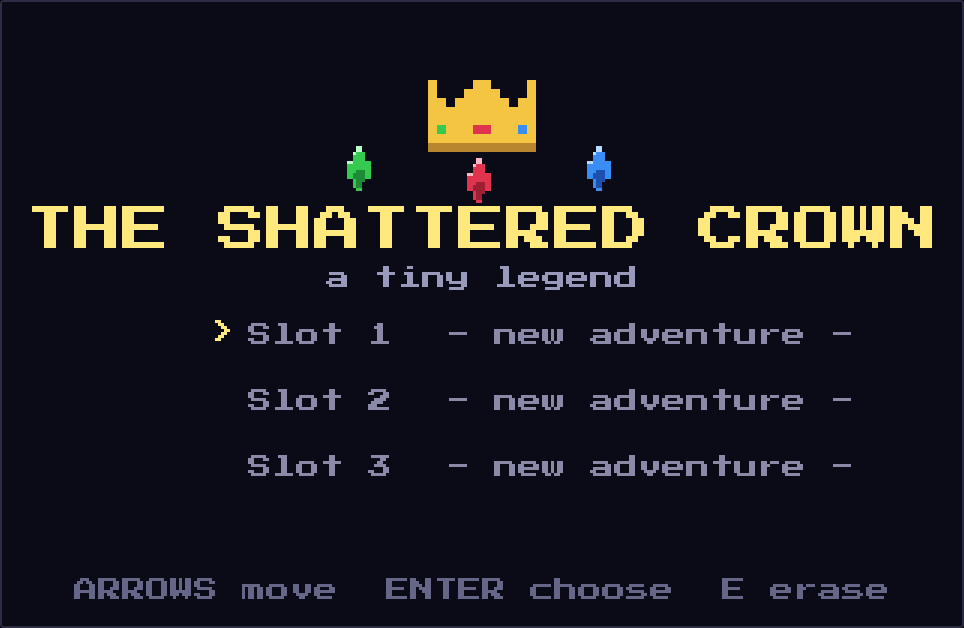
THE
SHATTERED
CROWN
COMPLETE WALKTHROUGH • ALL MAPS • EVERY SECRET
ALL 12 GOLDEN ACORNS REVEALED INSIDE!!
4 DUNGEON MAPS • BEASTIARY •
BOSS TACTICS THAT REALLY WORK
VOL. 1 — COLLECTOR'S EDITION — NOT FOR RESALE — PLAYER'S FUND EDITION $0.00
CHAPTER ZERO
THE LEGEND OF ELDORIA
Long, long ago — before the meadow paths were walked, before the first
lantern was lit — the land of Eldoria was wild and dark. It was the
Crown of Eldoria, forged by the first heroes from three sacred jewels,
that brought the balance: the Emerald of the deep forests, the
Ruby of the burning sands, and the Sapphire of the frozen peaks.
While the Crown sat whole upon its pedestal, crops grew tall, monsters kept
to the shadows, and kids could chase fireflies long after bedtime.
Then came Morgrath.
Once the royal court's cleverest sorcerer, Morgrath grew jealous of a power
he could study but never own. One starless night he split the Crown with a
single forbidden word, scattering its three shards to temples at the far
corners of the realm, each guarded by a monstrous general of his own twisted
making. Then he raised the Dark Citadel in the Ashen Wastes and sealed
himself behind a barrier no blade, bomb, or battering ram can break.
The land dimmed. Slimes oozed into the meadows. Skeletons climbed out of
the desert. Wolves of living ice came down from the mountains. And in the
little village of Willow, the elder Rowan looked at one brave kid —
you — and saw the only hope Eldoria had left.
TALES OF ELDORIA
"Three shards, three temples, three generals. Reunite the shards and the
barrier falls. Then it is you and Morgrath... and may your sword arm be
steady, little one." — Elder Rowan
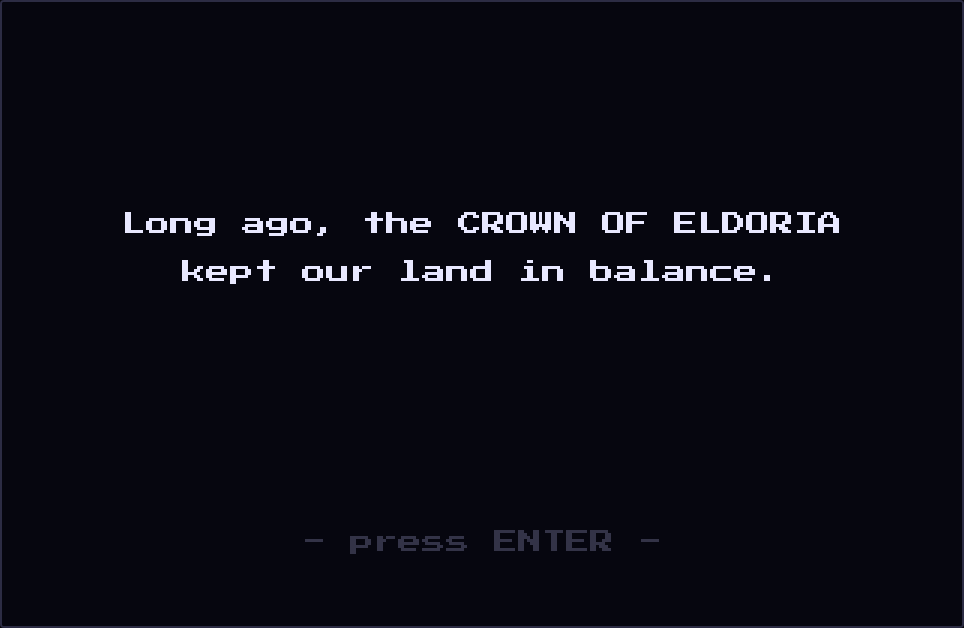
YOUR QUEST BEGINS! Press ENTER to read the prologue.
Your mission, hero:
- Recover the Emerald Shard from Vinewood Temple
- Recover the Ruby Shard from the Sandstone Ruins
- Recover the Sapphire Shard from Glacier Hollow
- Shatter the barrier, storm the Dark Citadel
- Defeat Morgrath — both of him! — and reforge the Crown
TRAINING GROUNDS
GETTING STARTED
CONTROLS OF A CHAMPION
| KEY | WHAT IT DOES |
|---|
| Arrows / WASD | Move your hero |
| SPACE (or Z) | Swing sword — also talk, read signs, open chests, buy |
| X | Use equipped item (bow, bombs, lantern, potion) |
| C (or TAB) | Switch equipped item |
| ENTER (or ESC) | Pause — inventory, equip and SAVE |
| M | Mute the music (but why would you?) |
PRO TIP
Talking, reading, opening and buying are all on SPACE — when something is in
front of you, SPACE interacts instead of swinging. Walk up close and face it!
SAVING YOUR QUEST
Three save slots live on the title screen. The game auto-saves every
time you enter or leave an area, find a treasure, or defeat a boss — and you can
save anytime: press ENTER, then S. Falling in battle never erases
your progress. Continue from your last save and march right back in!
WATCH OUT!
Pressing E twice on the title screen ERASES a save slot forever.
Guard your slot like you guard your hearts!
READING YOUR HUD
Top of the screen, left to right: your hearts (lose them all and it's
Game Over), gems, arrows and bombs (once you own their
launchers), potions, dungeon keys, your three shard slots,
and the item bound to X in the far corner box.
FIRST THINGS FIRST
- Visit Elder Rowan in the big house — he hands every new hero
30 gems to get started. Free money!
- Cut tall grass and bushes with your sword. Hearts, gems and arrows
hide inside. Smash pots too — it's not rude, it's adventuring.
- Talk to everyone twice. Villagers update their hints as your
quest moves forward.
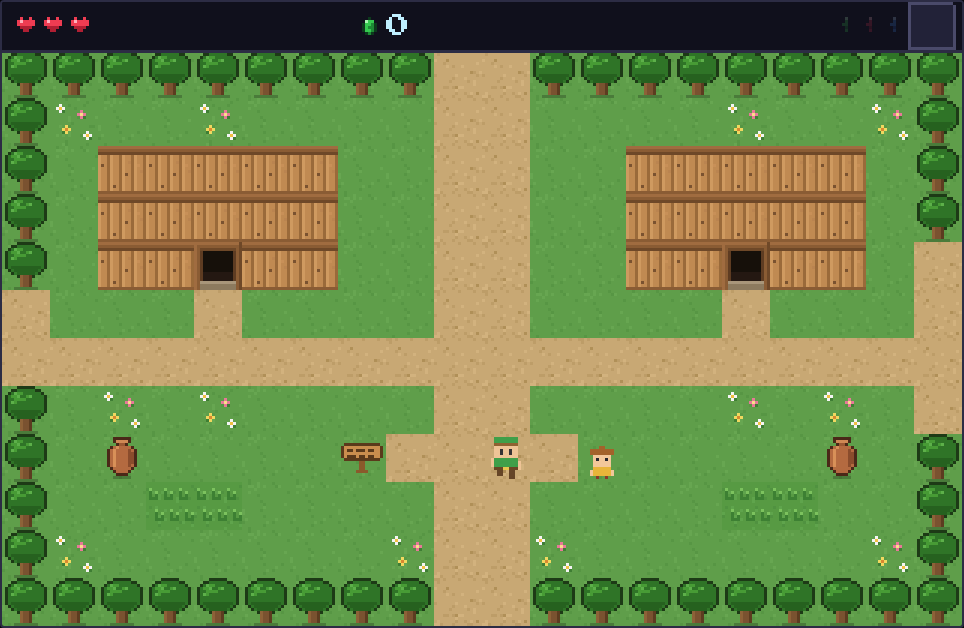
WILLOW VILLAGE — home sweet home. The journey of 80 screens begins with screen one!
FRIENDS OF THE REALM
PEOPLE OF ELDORIA

ELDER ROWAN
Willow Village's wise leader. Gives you 30 gems and your marching orders.
Report to him after every shard!

MIRA THE SHOPKEEP
Runs the village shop. Potion 40, ten arrows 20, five bombs 25, lantern 60.
The lantern is the best 60 gems you will ever spend.

PIP
Willow's resident expert in being seven years old. Surprisingly useful
rumors. Mostly jokes.

GUARD TOMAS
Watches the north road. Warns you about the mountain pass — listen to him,
then go anyway. You're the hero.

FARMER JOSS
Tends the southern fields. Knows which way the desert lies, and exactly
how many crops the slimes have eaten.

FISHER FINN
Lives on the lake's edge. The fairy pond to the northeast? He found it.
Ask him about the water.

HERMIT ALDOUS
Lives in a cave in the Frostpeaks (enter at the stairs on the high pass).
Knows what the cracked boulder at Glacier Hollow needs. BOOM.

NOMAD ZARA
Camps in the desert. The eye above the ruins' door? She knows what it's
waiting for. (It's an arrow. Bring a bow.)

WITCH MORLA
Her hut sits at the swamp's edge. Speaks in riddles about a sunken shrine
and a blade that "cuts twice as deep." She is not kidding.

FAIRY ARIA
Guardian of the healing ponds. Step into her waters and every heart
refills. Completely free. Visit often!

NUTWICK, THE SQUIRREL KING
Rules a hidden grove in the western forest behind a wall of bushes.
Obsessed with Golden Acorns. Pays ROYALLY for them — see the Classified
Section, page 15!
TALES OF ELDORIA
Nutwick claims his great-great-grandsquirrel helped forge the Crown by
fetching the wood for the bellows. Historians are skeptical. Nutwick is not.
MIRA'S GENERAL STORE — PRICE LIST
| WARES | PRICE | OUR VERDICT |
|---|
| Red Potion | 40 | Buy before EVERY boss. No exceptions. |
| 10 Arrows | 20 | Cheap. Eye switches don't shoot themselves. |
| 5 Bombs | 25 | Walls fear you now. |
| Lantern | 60 | The best gems you'll ever spend. Period. |
PRO TIP
Mira won't sell arrows or bombs until you own the bow or bag — and she
won't oversell past your carrying caps. Honest shopkeeping!
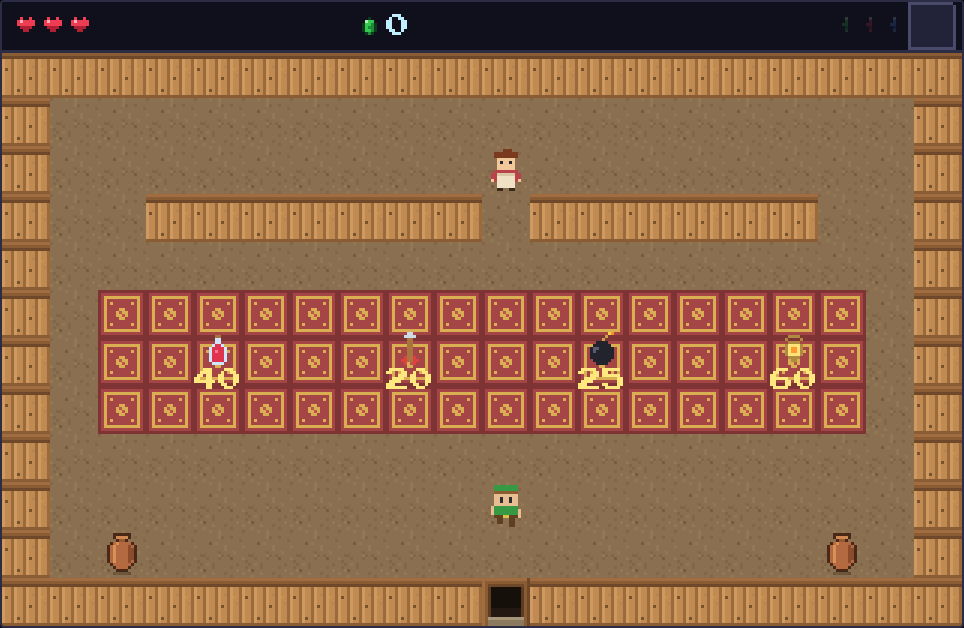
THE SHOP — walk up to a pedestal and press SPACE to buy.
POSTER PAGE — TAPE THIS TO YOUR WALL
THE WORLD OF ELDORIA
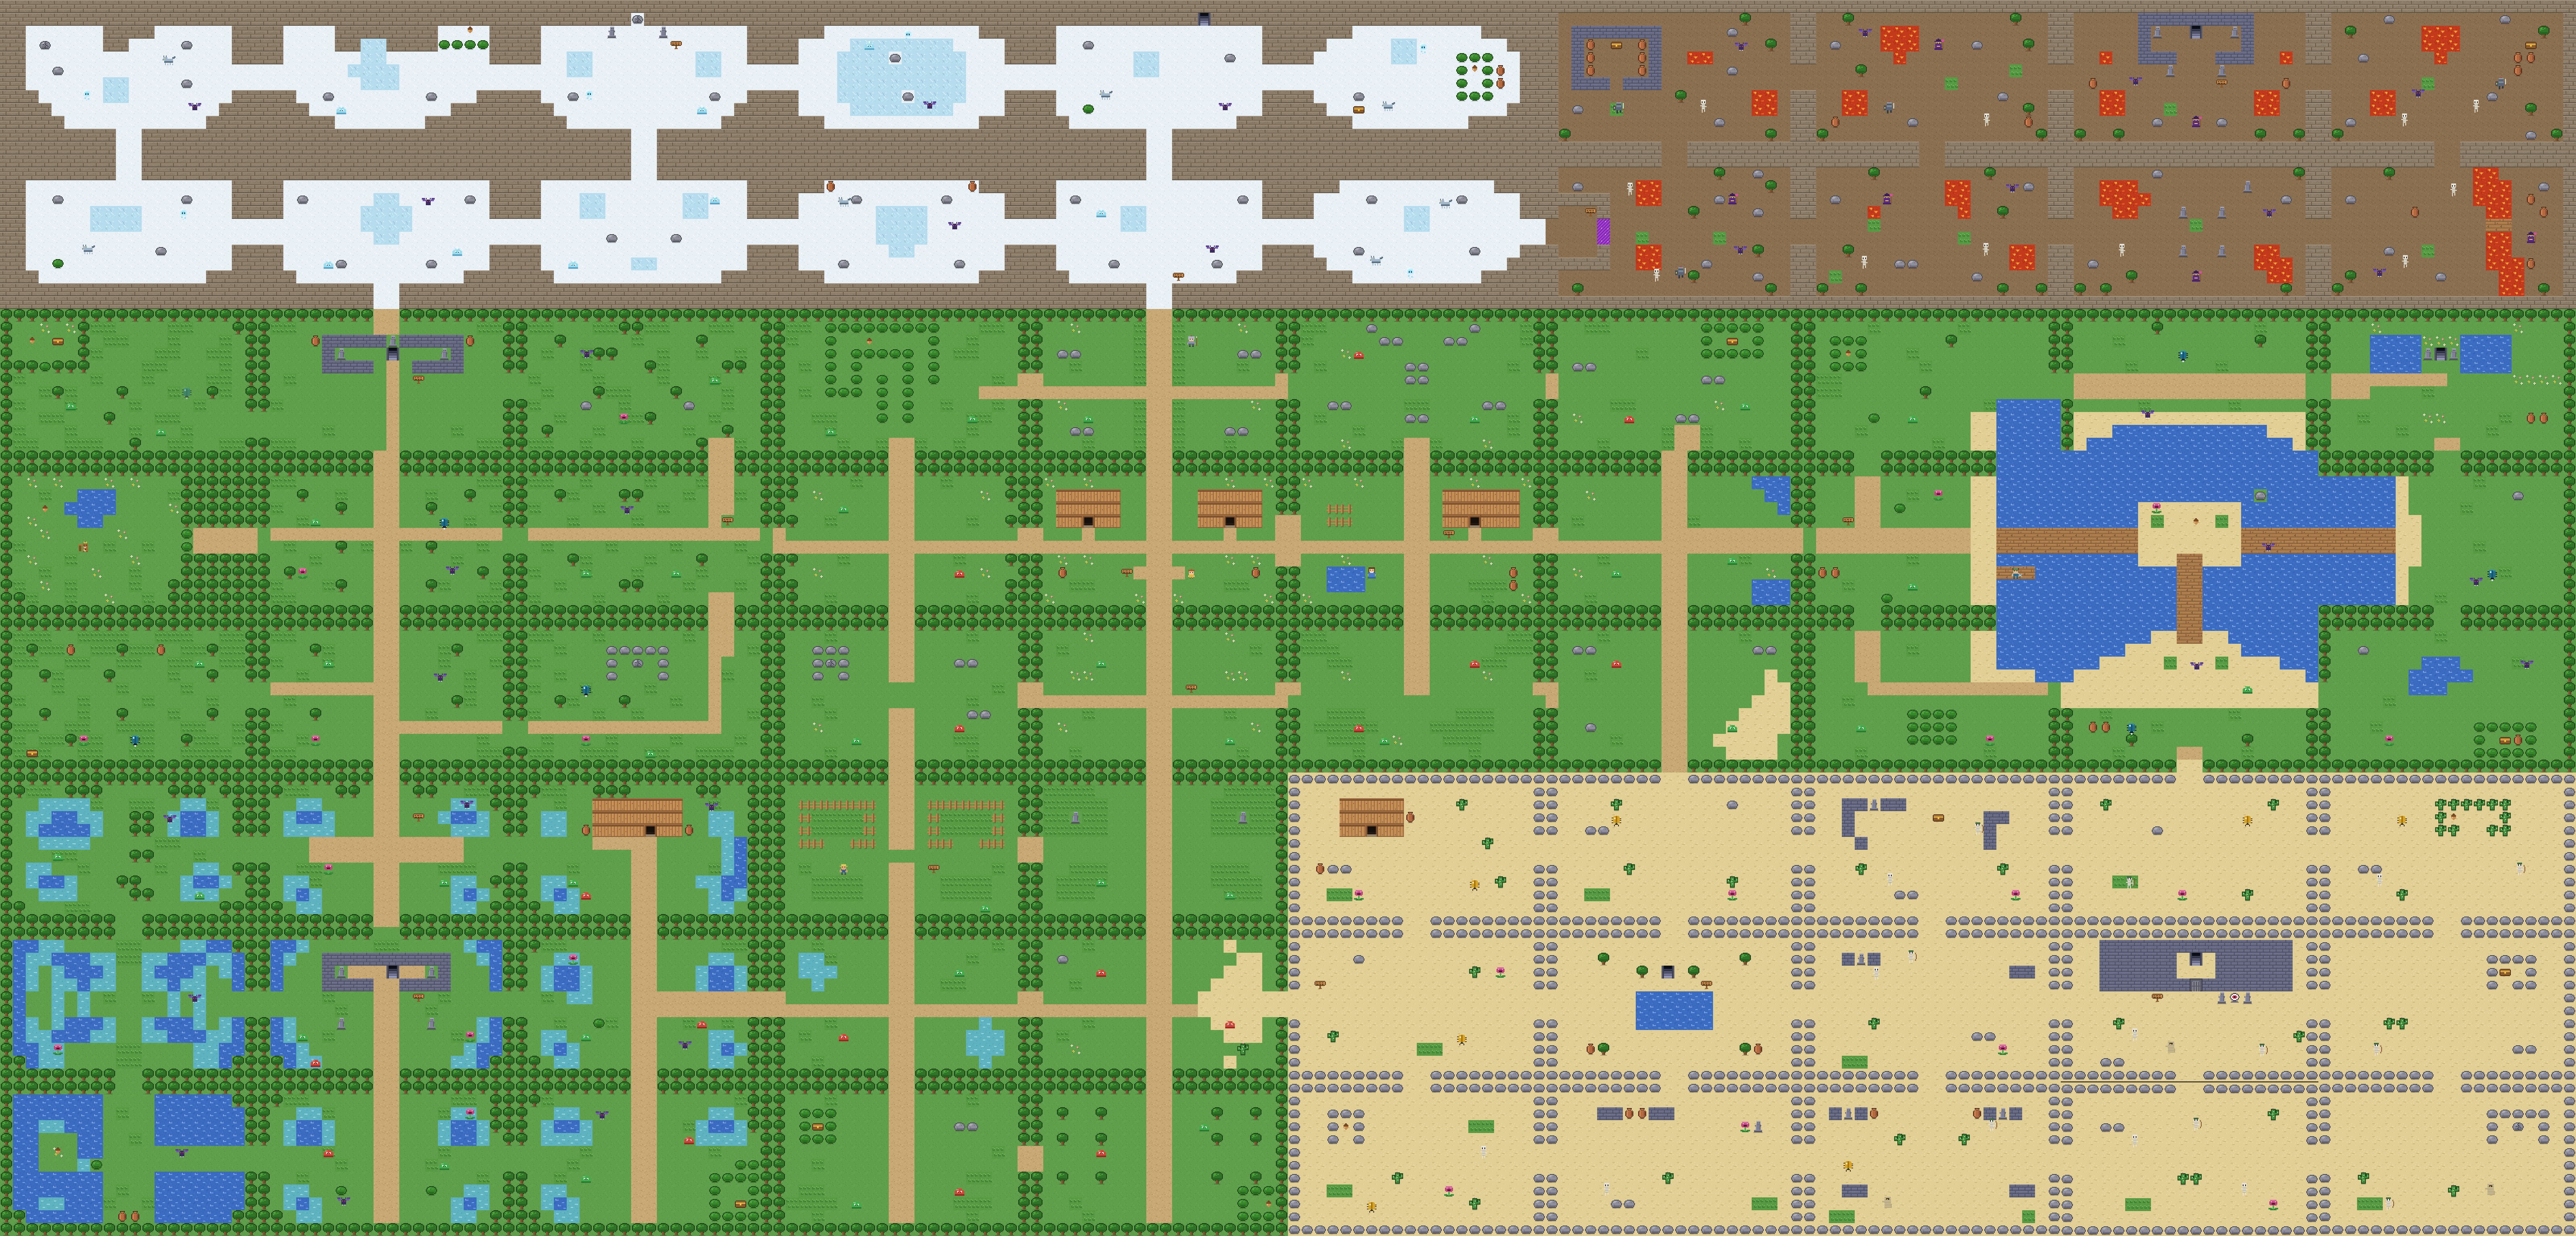
1
2
3
4
5
6
7
8
9
10
11
12
13
1Willow Village — start here!
2Vinewood Temple (Dungeon 1)
3Sandstone Ruins (Dungeon 2)
4Glacier Hollow (Dungeon 3)
5The Dark Citadel (Final!)
6Sunken Shrine (secret dungeon)
7Fairy Pond — free full heal
8Oasis Fairy Pond — free heal
9Witch Morla's Hut
10Hermit's Cave
11Nomad Zara's Tent
12Nutwick's Hidden Grove
13The Barrier — 3 shards open it
PRO TIP
The world is 10 screens wide and 8 screens tall. Region borders are sealed by
terrain except at the road gateways — if you're walled in, you're missing a path,
not a glitch. Follow the dirt roads!
REGION FIELD REPORT
| REGION | DANGER | WHAT'S OUT THERE |
|---|
| Meadows | ★ | Home turf. Slimes, the village, the crossroads, a bombable gem cave. |
| Forest | ★★ | Dungeon 1, Nutwick's grove, 3 acorns, two gem chests. |
| Lake | ★★ | Fairy pond, the bridge island, a bush hiding a Heart Container cave. |
| Swamp | ★★ | Slow wading, the witch's hut, and the Sunken Shrine below the mire. |
| Desert | ★★★ | Dungeon 2, the oasis pond, mummies, a Heart Container boulder. |
| Frostpeaks | ★★★ | Dungeon 3 (bombs required!), the hermit, ice wolves, HC boulder. |
| Ashen Wastes | ★★★★★ | Behind the barrier. Knights, wizards, lava — and the Citadel. |
GEAR UP, HERO
ITEMS & EQUIPMENT
WEAPONS OF LEGEND

WOODEN SWORD
Your trusty starter. 1 damage. Also cuts grass, bushes and pots —
Eldoria's economy runs on landscaping.

HERO'S BLADE ★SECRET★
DOUBLE DAMAGE on everything. Sleeps beneath the swamp in the Sunken
Shrine (page 16). Get it before the Citadel and thank us later.

HUNTING BOW
Found in Vinewood Temple. Fires arrows with X. Comes loaded with 10.
The only thing that can hit an eye switch!

BOMB BAG
Found in the Sandstone Ruins. Drops a bomb with X (comes with 5).
Blows up cracked walls and cracked boulders. Stand back!

LANTERN
Buy it from Mira (60 gems) or find one early in the Sandstone Ruins.
Lights torches with X and brightens dark rooms. Required for torch puzzles!

POWER BOOTS
Found in Glacier Hollow. Run faster forever — and never slip on ice
again. The puzzle-solver's best friend.
SUPPLIES

RED POTION
Press X to refill ALL hearts. Carry up to 4. Buy before every boss.
This is the guide's number one commandment.

HEART CONTAINER
Your maximum hearts grow by one! Bosses drop them; three more hide in
secret caves; one is buried in the Citadel; Nutwick holds another.

OAK CHARM ★SECRET★
Nutwick's final reward: ALL damage you take is halved. Forever.
Worth every acorn.

SMALL KEY
Opens one locked door in the dungeon where you found it. Our maps mark
every key so you never waste one.

BIG KEY
Opens the boss door. Guarded accordingly. No big key, no glory.

THE THREE SHARDS
Emerald, Ruby, Sapphire. Each dungeon's boss guards one. Collect all
three and the Barrier in the Ashen Wastes dissolves on sight.
PRO TIP
Carrying caps: 999 gems, 30 arrows, 12 bombs, 4 potions. Mira won't sell you
what you can't carry — she's honest like that.
KNOW YOUR ENEMY — PART ONE
BEASTIARY OF ELDORIA
HP = sword hits to defeat (Hero's Blade halves it!). DMG = hearts lost on contact.
FIELDS & FORESTS

SLIME
HP 1 • DMG ½ • hops
Eldoria's welcome committee. One bonk. Practice your timing here.

RED SLIME
HP 2 • DMG ½ • hops fast
Spicier cousin. Hops with less downtime — strike between bounces.

BAT
HP 1 • DMG ½ • flies
Weaves over pits and water. Wait for the swoop, then swing.

SPITTER
HP 2 • DMG ½ • shoots seeds
A rude plant. Sidestep its seeds and rush it — it barely moves.

BEETLE
HP 2 • DMG 1 • charges
Flashes, then dashes in a straight line. Step aside like a matador, then
poke it while it's dizzy.
SANDS & BONES

SCARAB
HP 2 • DMG 1 • charges fast
The beetle's track-team cousin. Bigger sidestep. Same dizzy poke.

SKELETON
HP 3 • DMG 1 • chases
Relentless walker. Backpedal and slash — your reach beats his bones.

SKELETON ARCHER
HP 2 • DMG ½ • shoots bones
Keeps its distance and plinks at you. Zigzag in, or return fire with
your own bow. Drops arrows!

MUMMY
HP 5 • DMG 1 • slow tank
Slow, tough, and patient. Hit-and-run four times — never trade hits.
Sometimes drops bombs!
FROZEN PEAKS

ICE SLIME
HP 2 • DMG 1 • hops
A slime that learned winter. Hits harder than its meadow kin.

ICE WOLF
HP 3 • DMG 1 • chases FAST
Fastest chaser in the game. Don't run — turn and meet it with steel.

FROST WISP
HP 2 • DMG ½ • flies + shoots ice
Floaty and annoying. Its shards travel in straight lines. Strafe, close
distance, swat.
KNOW YOUR ENEMY — PART TWO
THE DARK LEGION & THE GENERALS' GUARDS
MORGRATH'S ELITE

DARK KNIGHT
HP 6 • DMG 1 • chases • ARROW-PROOF
Armor shrugs off arrows entirely — you'll hear the clank. Sword and
bombs only. Circle behind and chip away.

WIZARD
HP 4 • DMG 1 • teleports + bolts
Blinks near you, fires, blinks away. The moment it appears is your
moment — be swinging where it lands.

EYE SENTRY
HP 3 • DMG 0 touch • turret
A stone eye that fires only when you line up with it. Approach
diagonally and it never gets a shot. Harmless to touch!
MINIBOSSES — THE GENERALS' GUARDS

BIG SLIME
HP 10 • DMG 1 • Vinewood Temple
A slime the size of a shed, guarding the Bow. Huge hops, huge landing
lag. Punish every landing and keep your feet moving.

MUMMY KNIGHT
HP 14 • DMG 1½ • Sandstone Ruins
Hits like a falling pyramid. It telegraphs its dash — bait it, dodge it,
then carve while it recovers. Patience wins.

ALPHA WOLF
HP 12 • DMG 1 • Glacier Hollow
Charges across the ice where YOU can't turn — stand near a wall, dodge
late, and let it crash. Guards the Power Boots.

BOG LURKER
HP 12 • DMG 1 • Sunken Shrine
Vanishes into the murk and pops up beside you spitting mud. Listen for
the splash, swing where it surfaces. Guards the Hero's Blade!
WATCH OUT!
Defeated minibosses stay defeated — but ordinary monsters return every time
you re-enter a screen. Great for farming hearts and gems; less great when
you're at half a heart. Know when to run!
PRO TIP
Every enemy can drop hearts, gems, arrows or bombs. Tougher enemies drop
better loot. A mummy hallway is a bomb shop with extra steps.
WALKTHROUGH — CHAPTER ONE
FROM VILLAGE TO VINEWOOD
Step one: see Elder Rowan (30 free gems!), read every sign, and mow
the village lawns for pocket change. When your courage is topped up, take the
west road out of the village square.
Step two: the crossroads. South lie the farms; keep west through the
meadows. Slimes and the odd red slime patrol here — perfect sword practice.
Work toward the forest border two screens west.
Step three: the forest. Tall trees, winding paths, spitters lobbing
seeds from the undergrowth, and bats in the canopy. Head for the
north-west clearing where stone statues flank a mossy staircase:
Vinewood Temple.
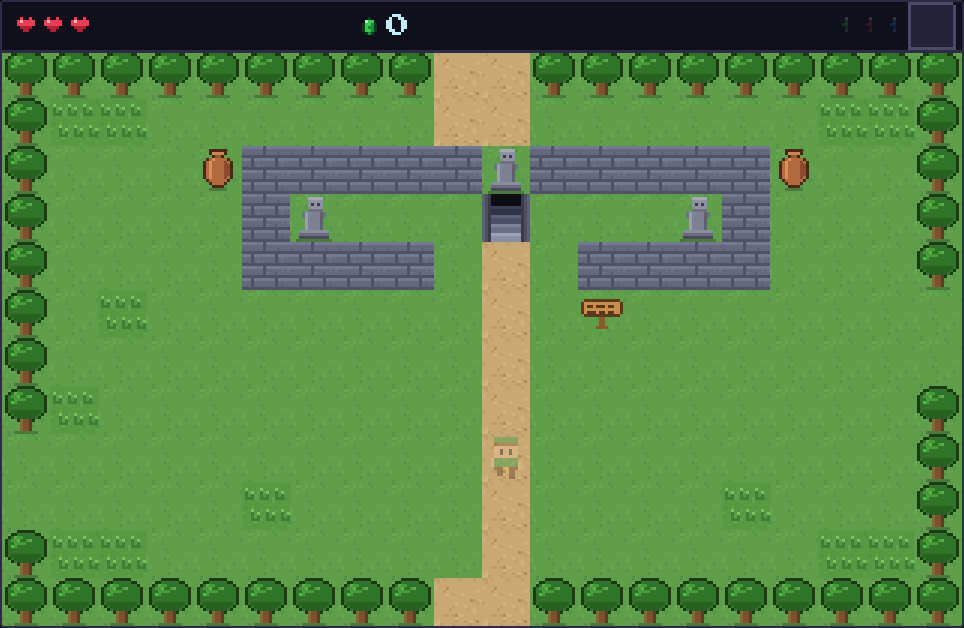
VINEWOOD TEMPLE — down the stairs and into Dungeon 1!
PRO TIP
Before the temple: stock up! 20 gems buys 10 arrows — useless now (no bow
yet), but a potion (40) in your pocket turns a scary first dungeon
into a comfy one. Short on gems? There's a 20-gem chest behind bushes in the
far north-west forest nook, and a 50-gem chest in the south-west woods.
SIDE QUEST: THE SQUIRREL KING
In the forest's western clearing, a suspicious wall of bushes hides a grove.
Cut through and meet NUTWICK, KING OF SQUIRRELS, who pays out for
Golden Acorns at 4, 8 and 12 collected. There's an acorn lying in his own
grove. Take it. He won't notice. (He will absolutely notice. He counts them
daily. Take it anyway.)
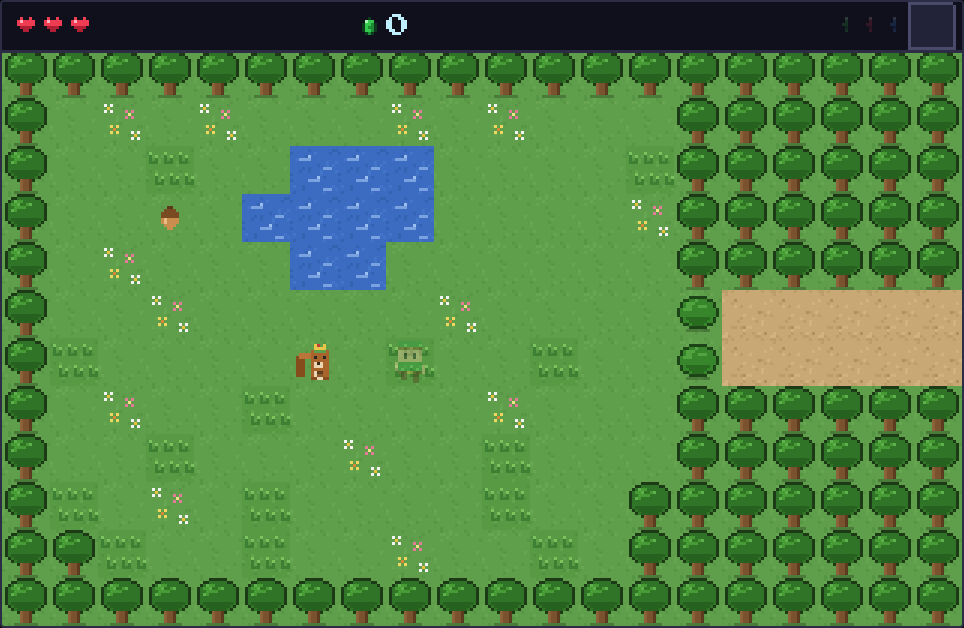
THE HIDDEN GROVE — His Royal Fluffiness awaits your tribute.
TALES OF ELDORIA
Why are the acorns golden? Morgrath's barrier leaks raw magic on the wind.
It lands on ordinary acorns. Nutwick considers this the one good thing the
sorcerer ever did.
WALKTHROUGH — CHAPTER TWO
DUNGEON 1: VINEWOOD TEMPLE
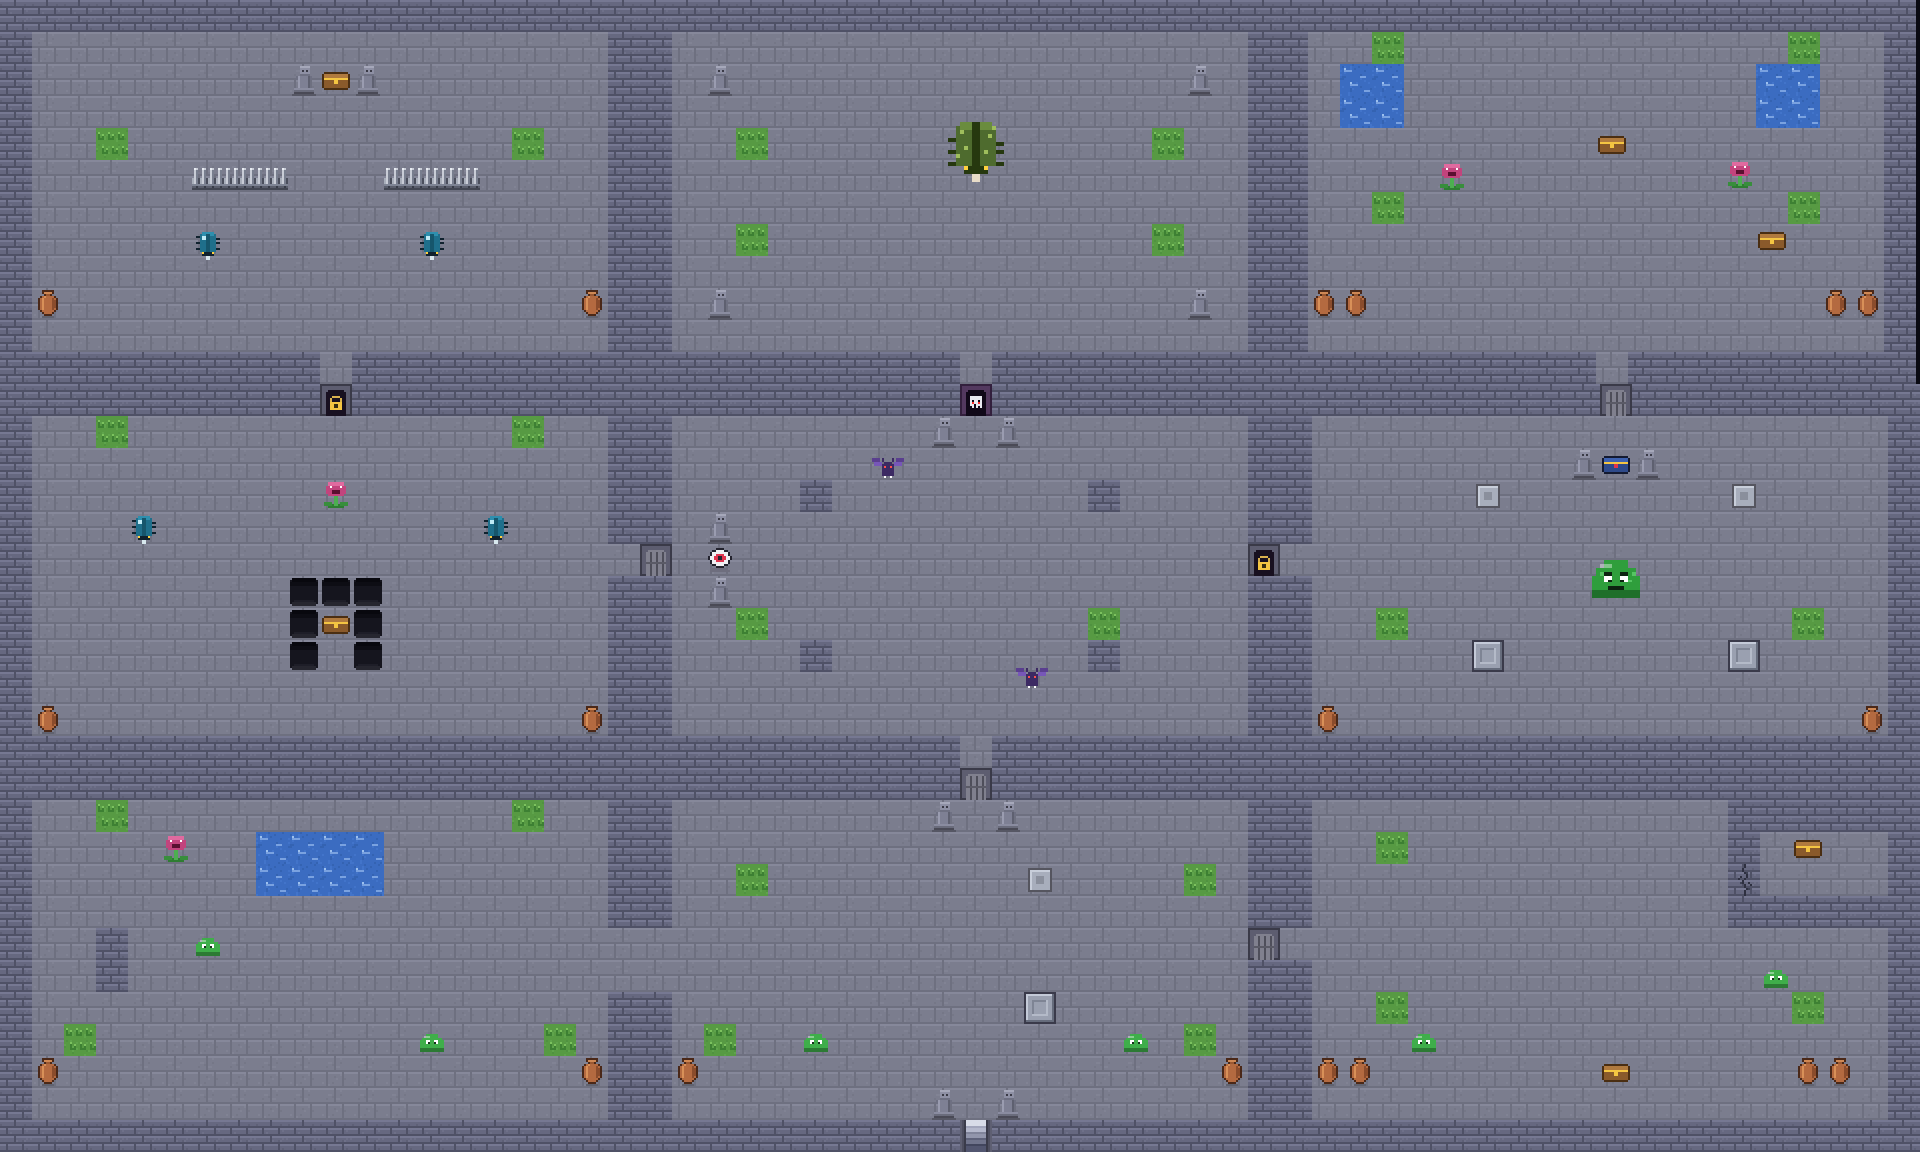
FULL TEMPLE MAP — entry at bottom-center. Boss waits top-center!
- Entry hall: push the stone block onto the floor plate to open
the north door. Your first puzzle — the block slides one tile per shove.
- South-west room: clear every monster and a Small Key #1
chest appears. Sealed doors with monsters behind them work like this all
game: clear the room, claim the prize.
- The hub: note the eye switch staring at you. It wants an
arrow you don't have yet. East first!
- Locked door (key #1) east: the BIG SLIME miniboss guards a
golden big chest — the HUNTING BOW (with 10 arrows). Dodge the hops,
strike the landings.
- Supply room (north of the miniboss): plates + a fight open the way
to spare arrows and gems. Stock up.
- Back to the hub: arrow the eye switch — the west door grinds
open. Small Key #2 lives in the south-west wing.
- North-west vault: the BIG KEY. Now the ominous boss door in
the hub's north wall will open.
SECRET
The south-east bonus room has a cracked wall. You can't open it yet —
remember it, and come back after Dungeon 2 with bombs for a 50-gem payday.
BOSS: BRAMBLEHORN
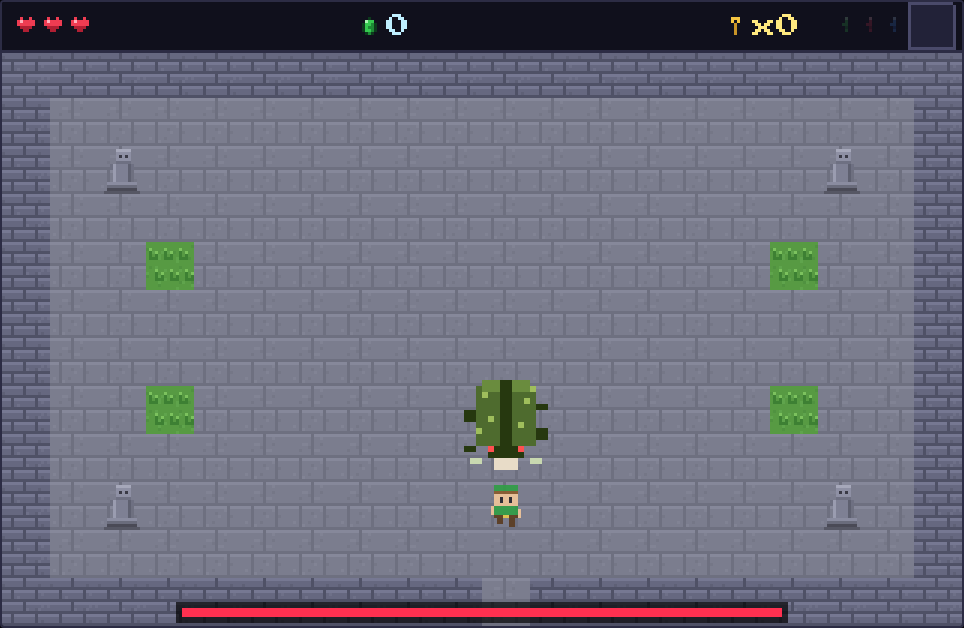
BRAMBLEHORN — 14 HP of angry beetle. Wait for the WALL CRASH!
The temple's general is a beetle the size of a wagon, and your sword
bounces right off its shell. Here's the trick the temple priests carved
into the walls: it can't steer. Stand in its line, wait for the
telegraph flash, hop aside — and when it slams into the wall, it's stunned
and soft for a full three seconds. That's your window. Slash, retreat,
repeat. Reward: Heart Container + THE EMERALD SHARD!
PRO TIP
Take the glowing portal home — and visit Elder Rowan. Everyone in the
village has new things to say after each shard!
WALKTHROUGH — CHAPTER THREE
DUNGEON 2: SANDSTONE RUINS
Getting in: cross the south meadows into the desert and head for the
great ruin in the south-east. The door is sealed — but a stone eye
watches from the facade. You have a bow now. You know what to do.
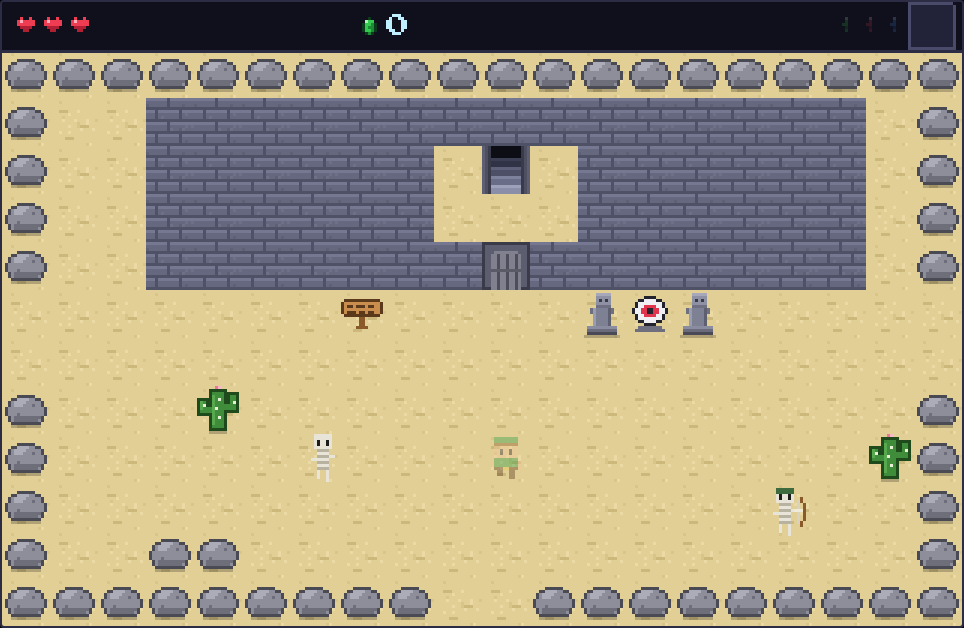
ONE ARROW OPENS THE WAY. Zara tried everything else for years.
- Entry: go WEST first — a lantern sits in a chest in plain
sight. (Already bought one from Mira? The chest pays gems instead.)
- East kill room: clear it for Key #1, then light the
two torches to unseal the north door.
- MUMMY KNIGHT miniboss: bait the dash, punish the recovery.
Victory opens the vault — the golden chest holds the BOMB BAG
(with 5 bombs).
- Key #1 unlocks the entry's north door — the hub. Twin eye
switches here open a handy shortcut east.
- West wing: push-blocks onto plates plus a torch open the way to
the BIG KEY vault. Key #2 is in this wing too, in a spike
nook — careful feet!
- North wing (dark!): lantern up. A pit maze guards Key #3,
and a cracked wall here must be bombed to push deeper.
- Gauntlet east, then the boss door. Potion check: got one?
SECRET
FOUR more cracked walls hide bonus caches in this dungeon — west of the entry,
in the big-key vault, in the gauntlet, and beside the bomb vault. When in
doubt, bomb the suspicious wall. The ruins respect demolition.
BOSS: VESPER THE SAND WYRM
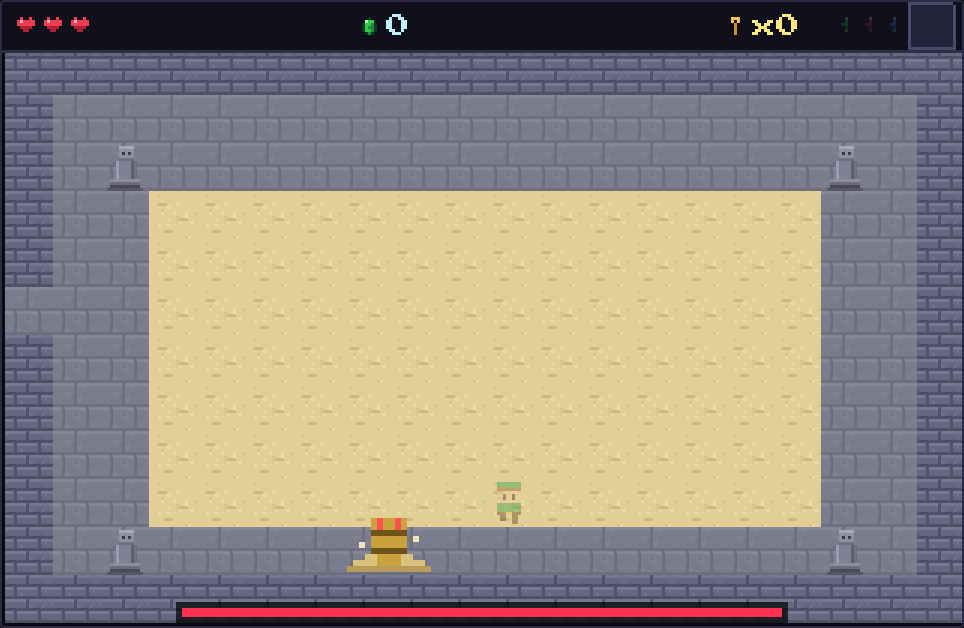
20 HP OF BURROWING NIGHTMARE. Only the surfaced wyrm can be hurt!
The arena floor churns. The wyrm is untouchable underground — watch
the sand bulge, step away from the rising spot, and dodge the spit. Then it
surfaces for five long seconds: attack! Sword if you're brave, arrows
if you're sensible. Reward: Heart Container + THE RUBY SHARD!
WATCH OUT!
Out of bombs mid-dungeon? Mummies drop them, and Mira sells five for 25.
Never bomb your last wall without a plan, hero.
WALKTHROUGH — CHAPTER FOUR
DUNGEON 3: GLACIER HOLLOW
Getting in: take the mountain pass north (Tomas will fret — wave
cheerfully). On the high snowfield, a cracked boulder plugs a cave
mouth. One bomb later, Glacier Hollow yawns open.
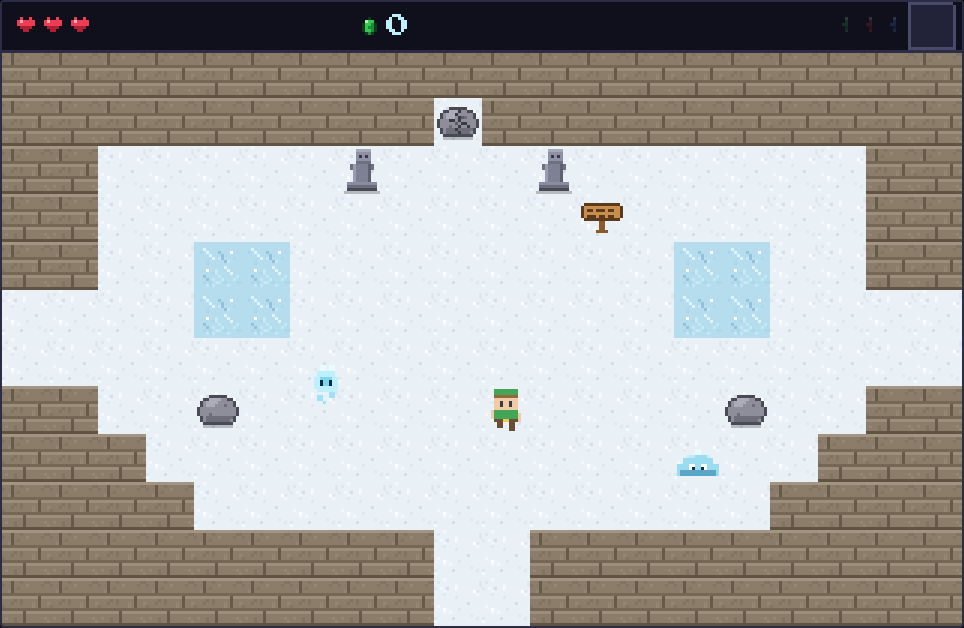
THE BOULDER. Hermit Aldous has been staring at it for 20 years. You brought bombs.
Ice rules: on blue ice you slide — steer gently, plan ahead.
Blocks pushed on ice glide until they hit something. Every sokoban
puzzle here is built on that. (Mess one up? Leave the room and return —
blocks reset. The glacier is forgiving. The wolves are not.)
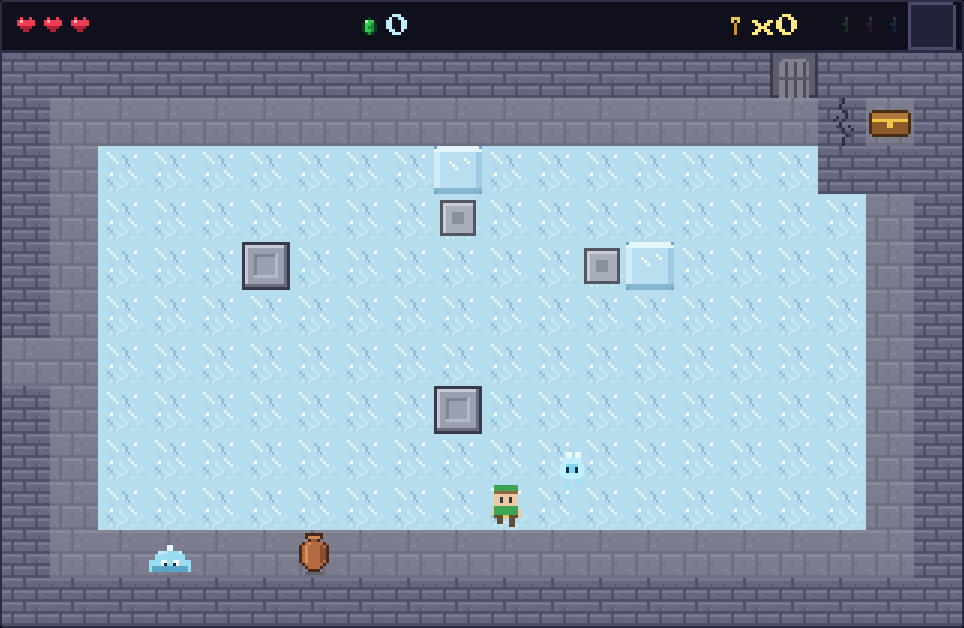
SOKOBAN ON ICE — line the block up so an ice block stops it ON the plate.
- West of entry: the ice-slide maze. Ride it to Key #1.
- East of entry: wolf den (clear-sealed) into the sokoban on
ice — plates open a pocket holding Key #2.
- Hub (locked door #1): a cracked wall in the hub itself
hides Key #3. Bombs again!
- West wing: triple-plate sokoban, then the sentinel vault — clear
the eye sentries for the BIG KEY. Approach sentries diagonally!
- East wing: the three flames hall (lantern!) leads to the
ALPHA WOLF arena. Let it crash into walls, then strike. The golden
chest holds the POWER BOOTS — faster forever, and no more
slipping on ice.
- North crevasse (optional): pits, sentries, treasure. Boots help.
- Hub north: the boss door.
BOSS: KARN THE FROST REVENANT
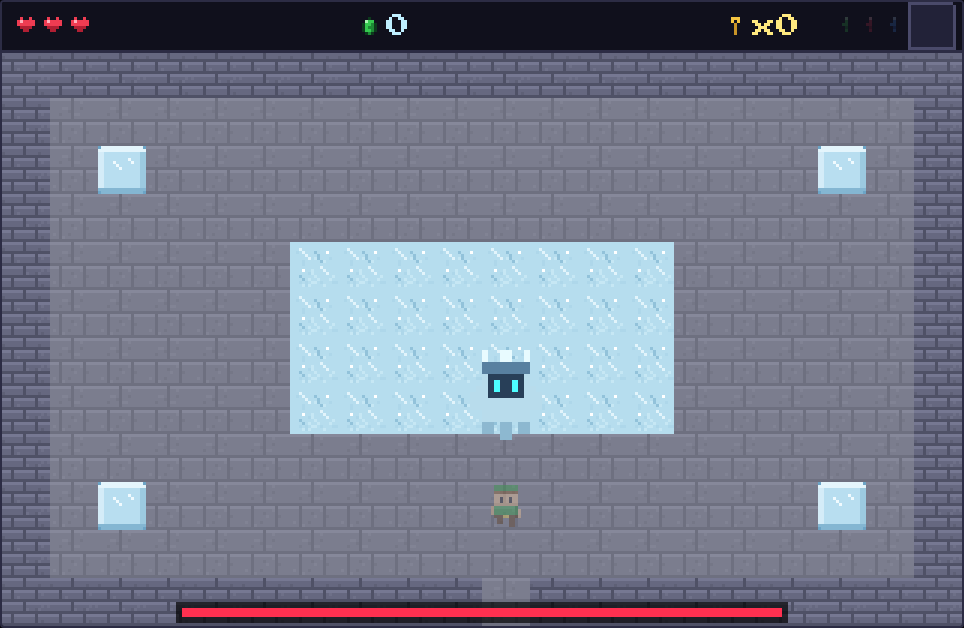
22 HP, TELEPORTS, SUMMONS. The busiest fight yet — stay moving!
A frozen sorcerer who blinks around the arena hurling fans of ice.
Halfway down, he calls frost wisps to the fight — swat them fast or
drown in shards. He's vulnerable whenever he's visible: chase the
materialize, land two hits, dodge the barrage, repeat. Reward:
Heart Container + THE SAPPHIRE SHARD!
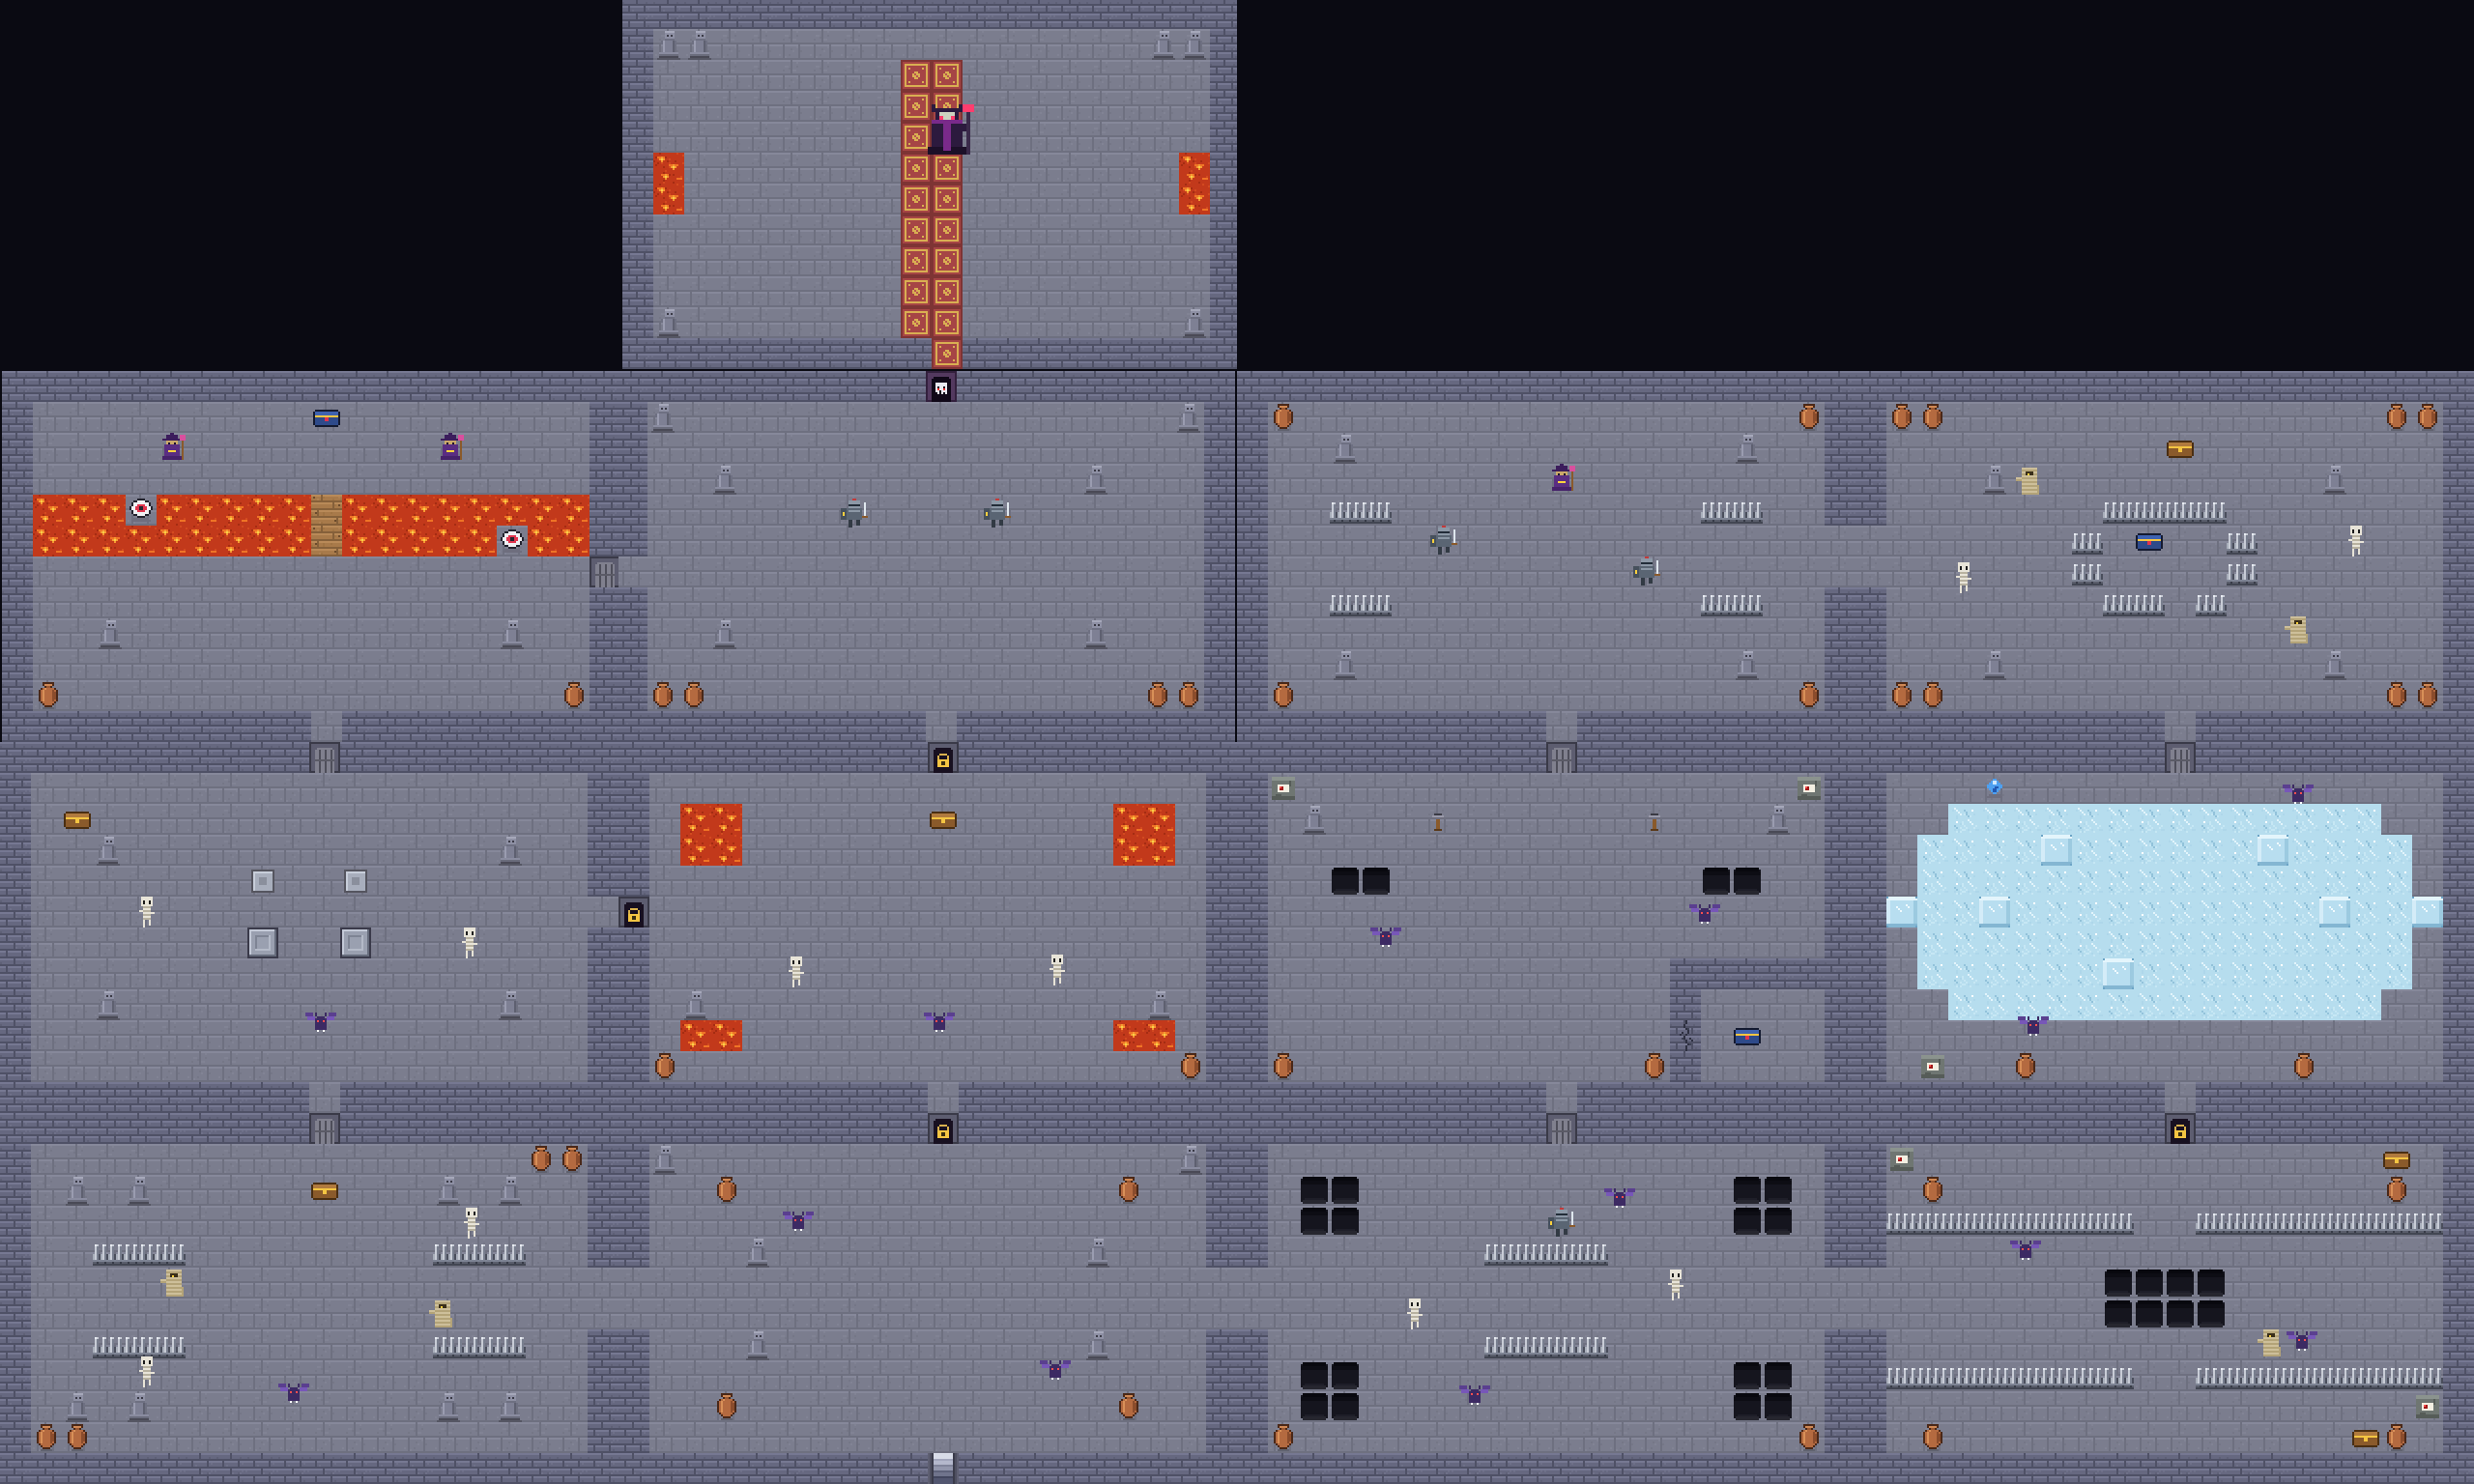
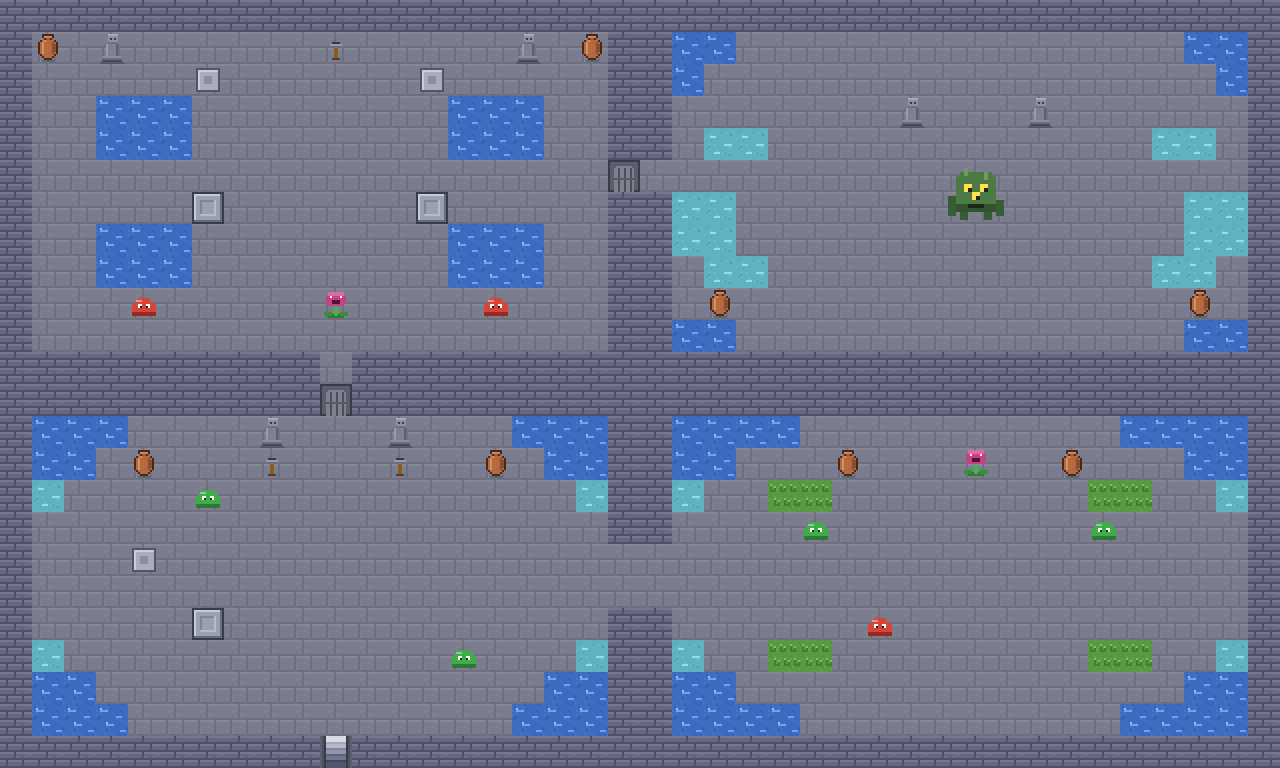
POSTER PAGE — THE CARTOGRAPHER'S SPREAD
DUNGEON MAPS: RUINS & HOLLOW
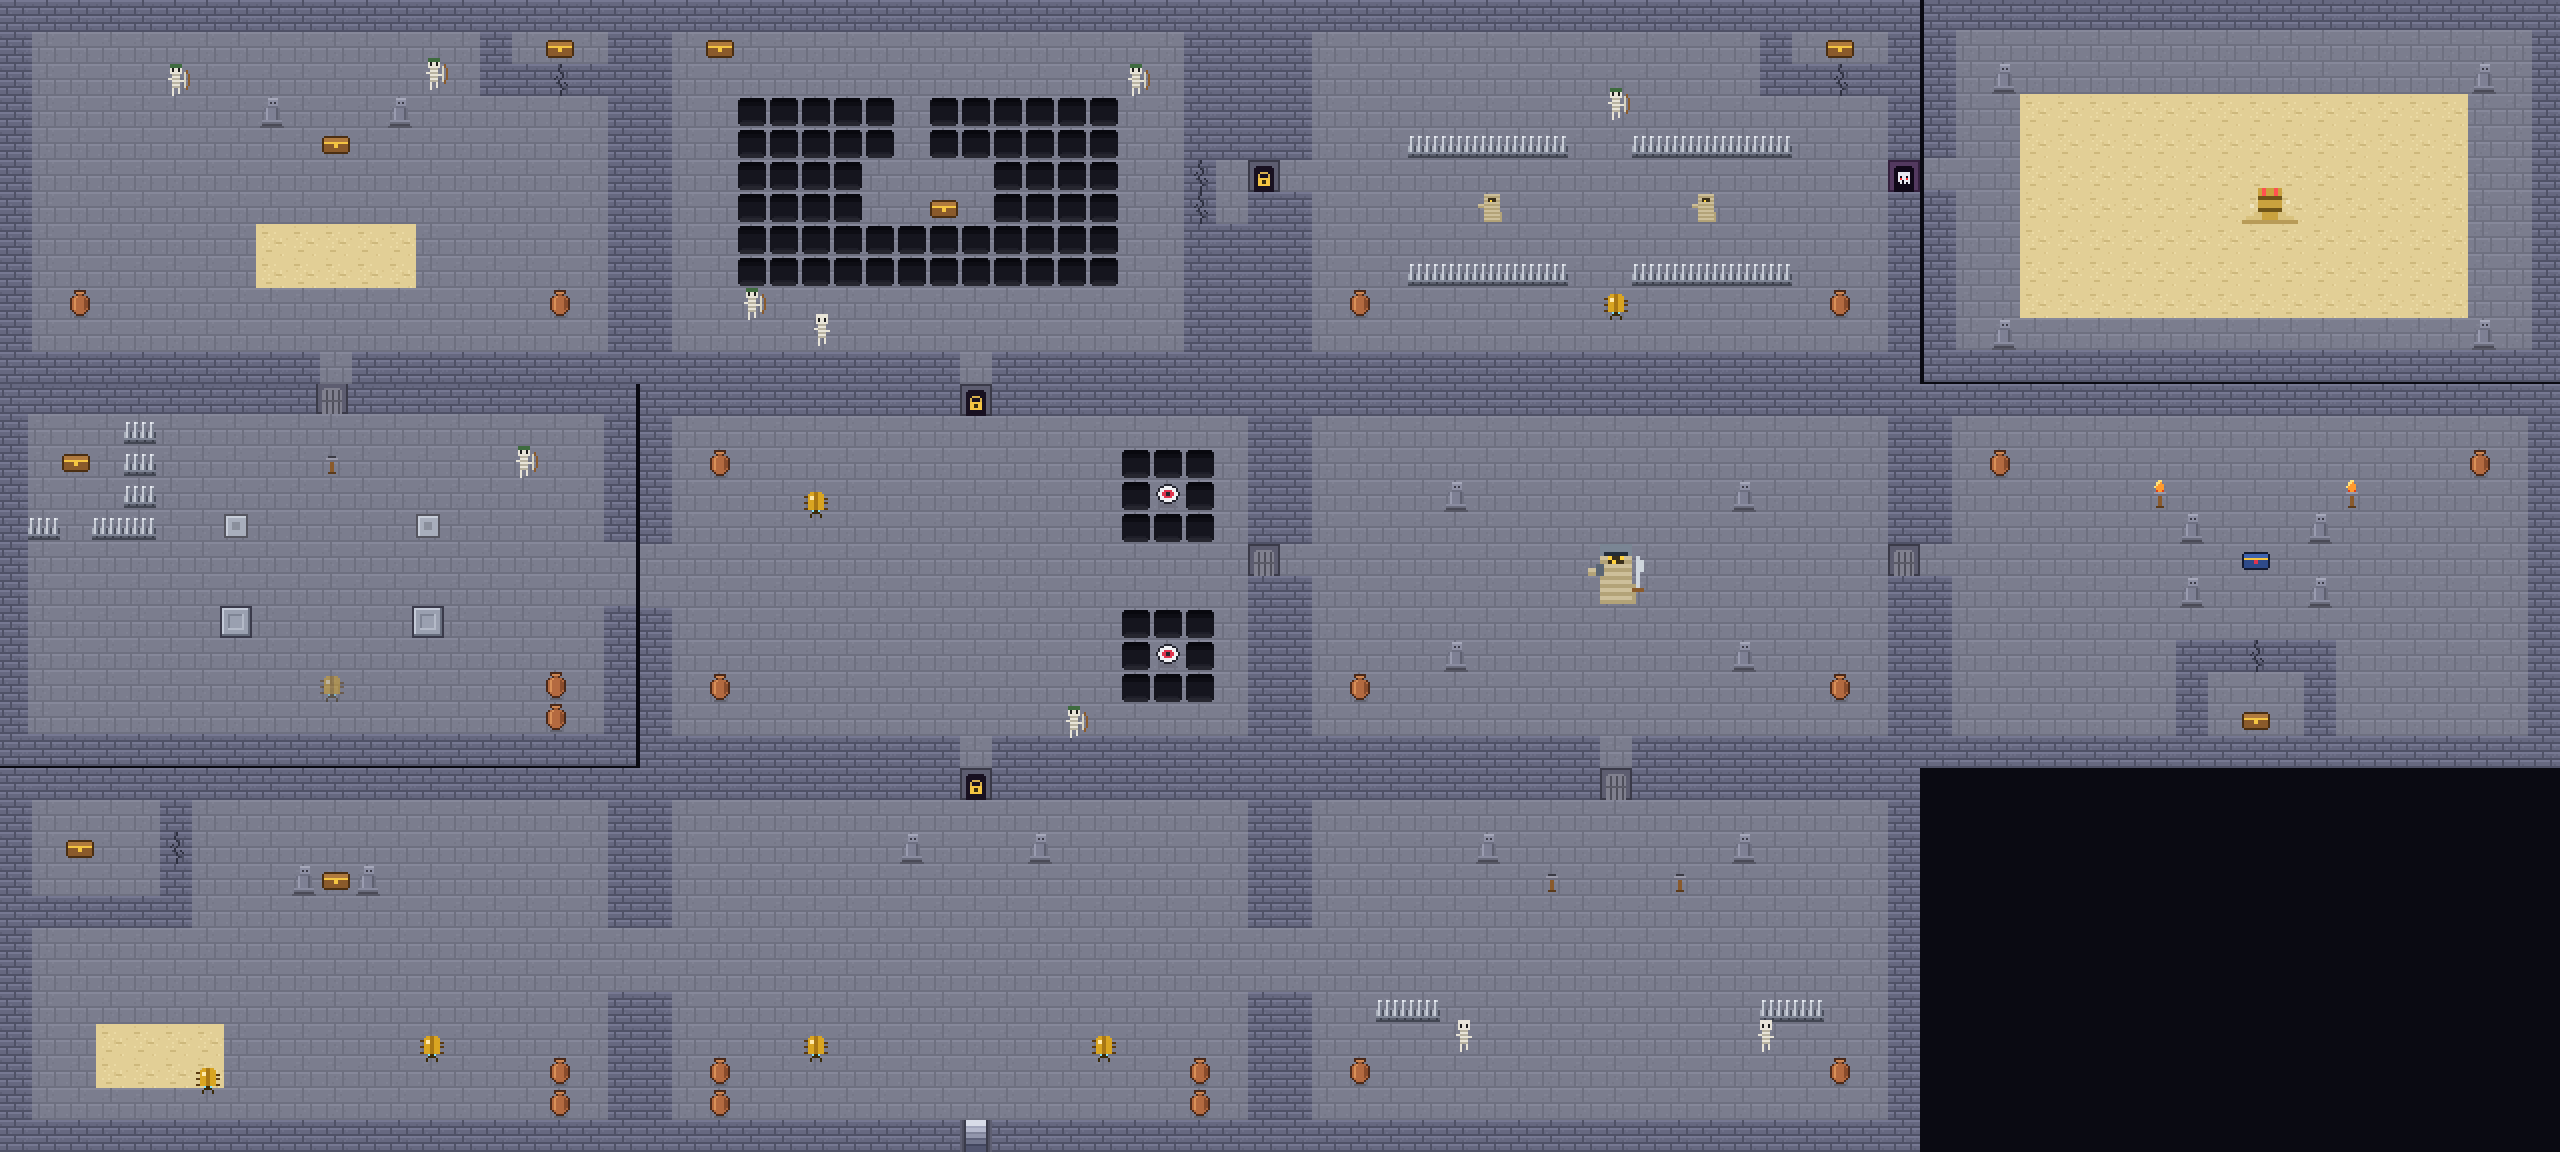
SANDSTONE RUINS — 11 ROOMS OF TOMB
Entry bottom row, second from left. Lantern chest LEFT of entry — grab it first! Boss arena: top-right. Dark rooms shown lit for your convenience. You're welcome.
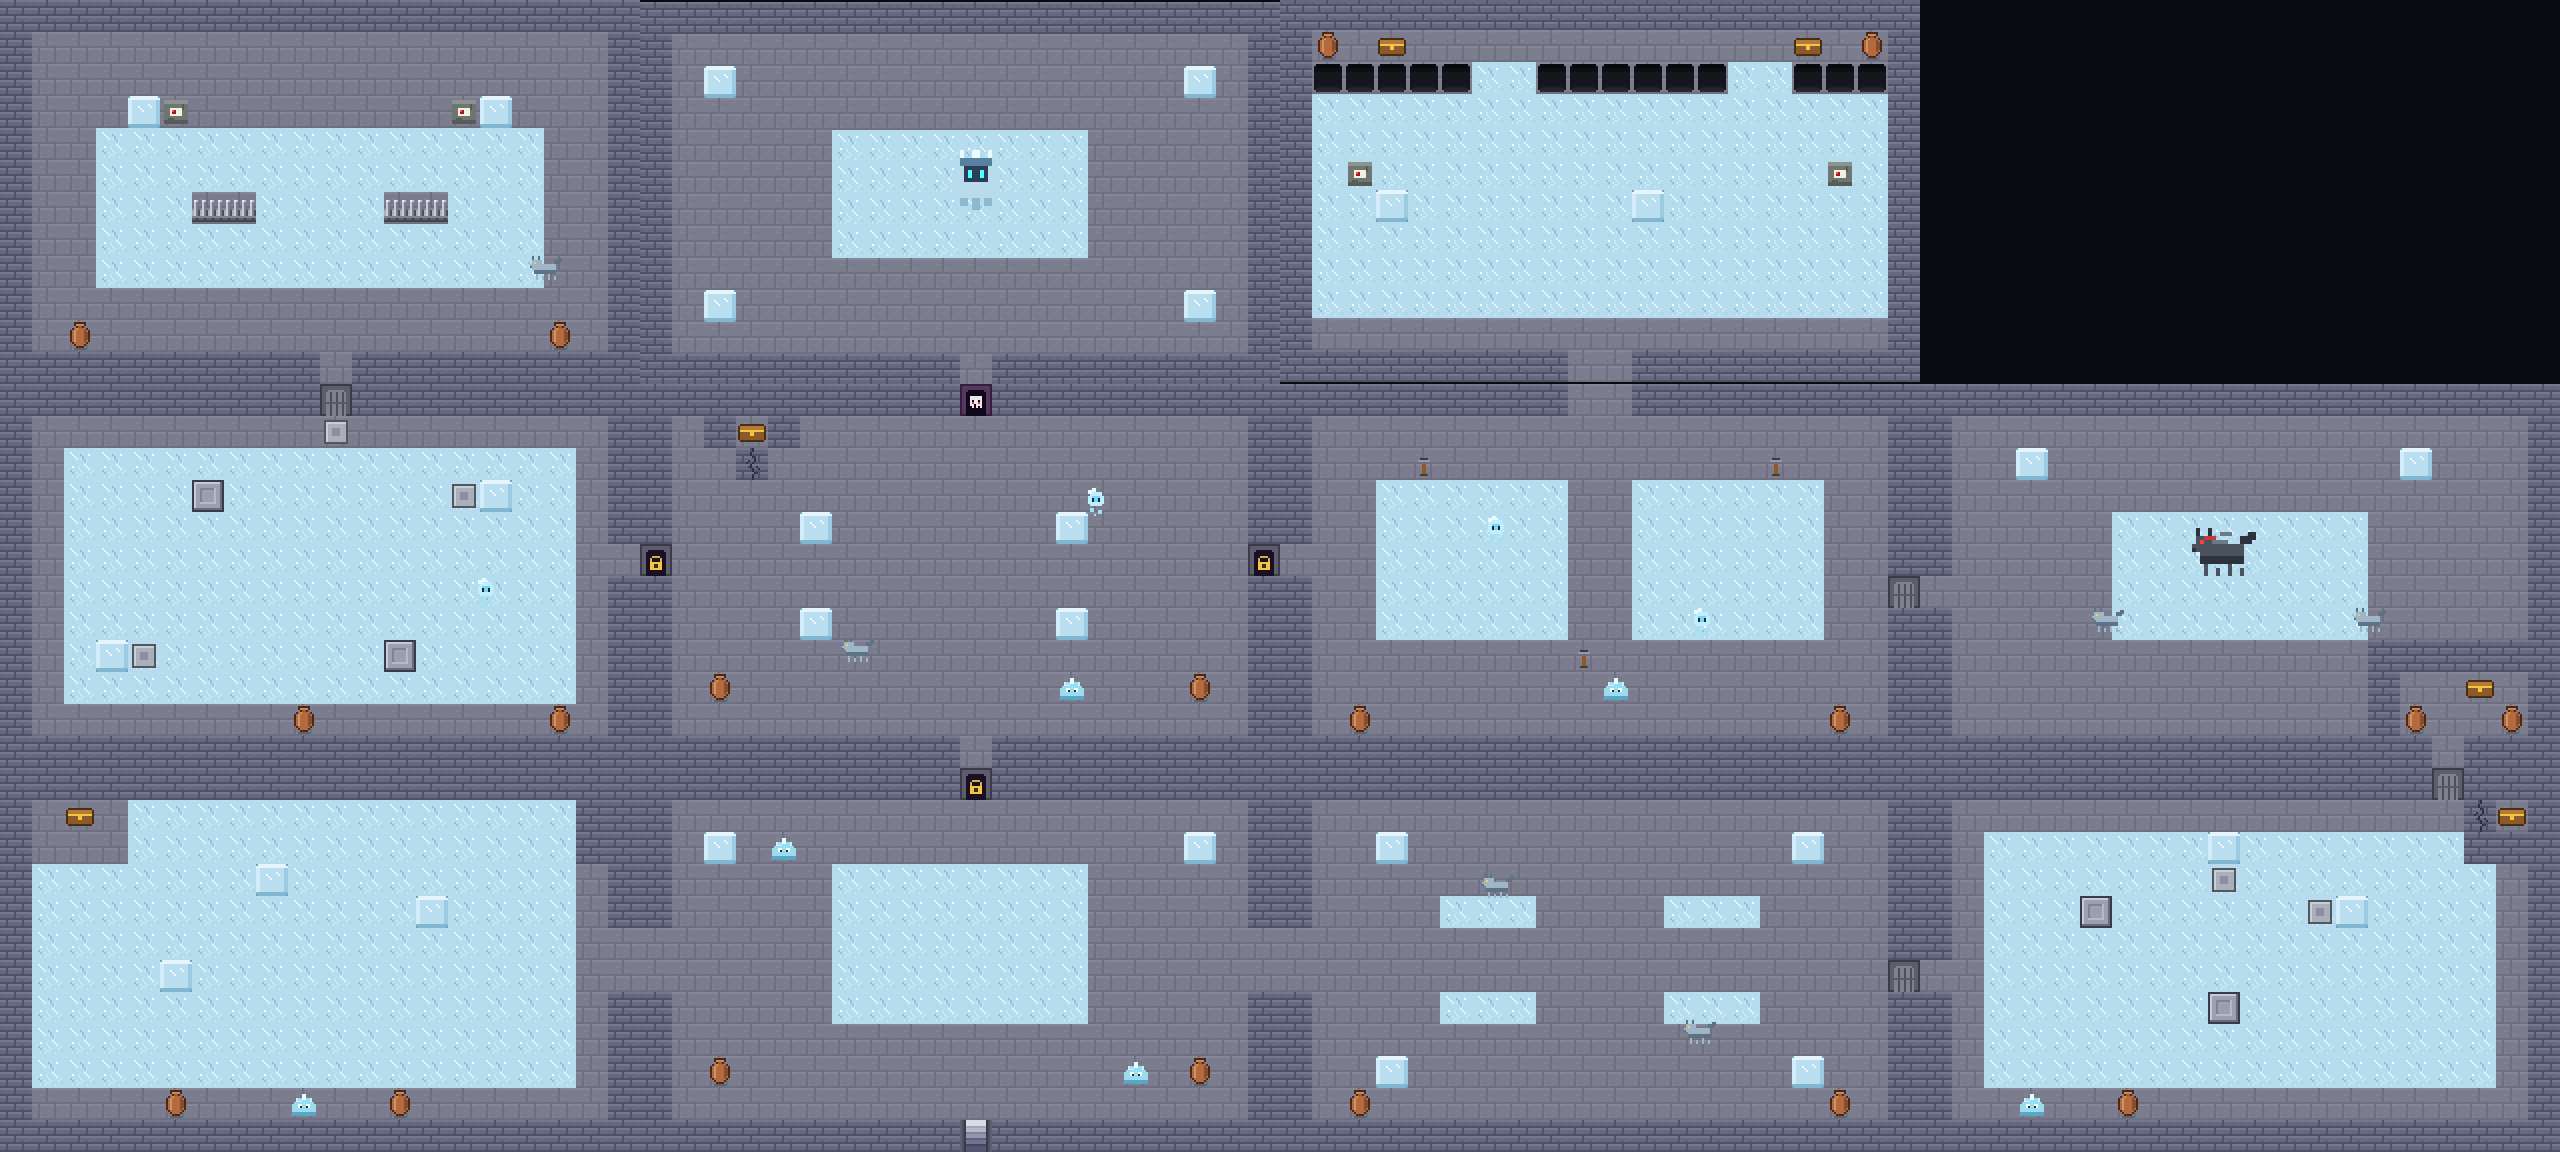
GLACIER HOLLOW — 11 ROOMS OF ICE
Entry bottom row, second from left. Ice-slide maze to its LEFT, wolf den + sokoban RIGHT. Boss: top row, second from left. Spot the cracked hub wall hiding Key #3!
PRO TIP
Reading our maps: gold dots = pots (smash!), small chests = keys and gems,
GOLD chests = dungeon treasures, dark doorways = doors that need keys,
switches and flames. If a wall looks cracked, it is. Bombs fix everything.
WALKTHROUGH — CHAPTER FIVE
THE BARRIER & THE DARK CITADEL
Three shards sing in your pack. East of the mountain pass, the Ashen
Wastes begin — dead trees, boiling lava, and Morgrath's shimmering
Barrier. Walk up to it with all three shards and watch it
dissolve like sugar in rain. No button needed. You earned this.
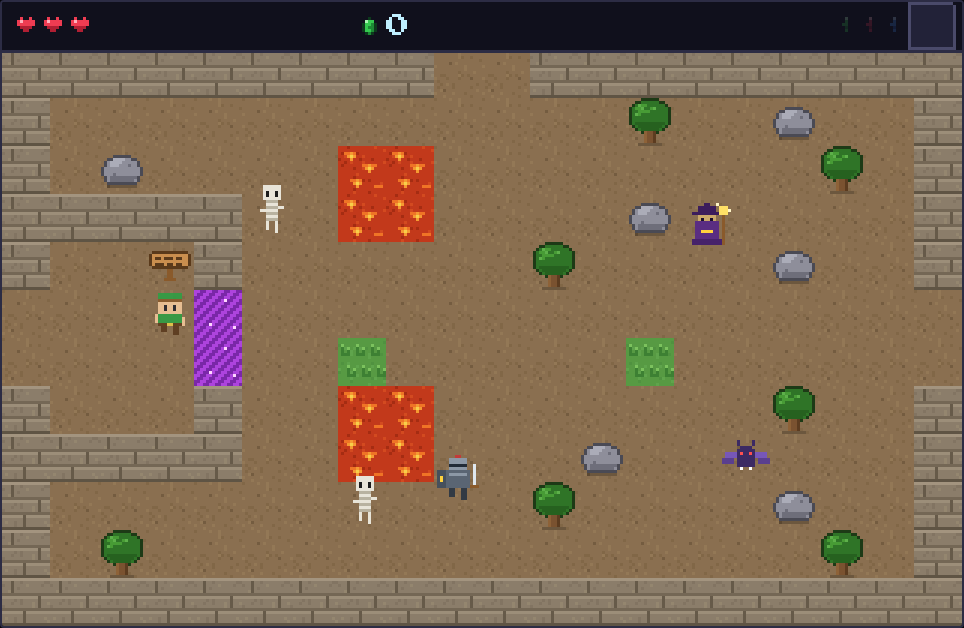
THE BARRIER FALLS — the Wastes are open. So is the worst place in the world.
WATCH OUT!
The Wastes are end-game country: dark knights (ARROW-PROOF!), wizards,
skeletons. Lava walls burn on touch. There's a 50-gem cache and a 5-bomb
cache hidden out here for heroes who explore — see the Classified Section.
The Dark Citadel looms in the north-east. Checklist before the
gates: Hero's Blade (page 16!), 4 potions, full bombs and
arrows, and every Heart Container you can claim. This place is a fortress,
a puzzle box and a final exam all at once.
THE DARK CITADEL — entry at bottom-center; Morgrath's throne crowns the top.
THE SAFE ROUTE (4 KEYS, ZERO REGRETS)
- Key #1: the gauntlet room east of the entry — seal yourself in,
clear it out.
- Key #2: the crypt west of the entry. Dark room — lantern up.
- Key #1 opens the entry's north door — the hub.
- Key #3: west of the hub past the sokoban. Key #4: the war
room east of the pre-boss hall.
- BIG KEY: the lava gallery (north-west) — eye switches
across the lava open the path. Don't hug the lava walls; they burn.
- Hub north → sanctum → throne room.
PRO TIP
Every key in the Citadel can be reached WITHOUT spending one — so you can
never lock yourself out. The architect was evil, not cruel.
SECRET
The torch room east of the hub hides a bombable alcove — inside is
the Citadel's own HEART CONTAINER. Do not skip this.
WALKTHROUGH — FINAL CHAPTER
MORGRATH: THE LAST BATTLE
PHASE ONE — THE SORCERER
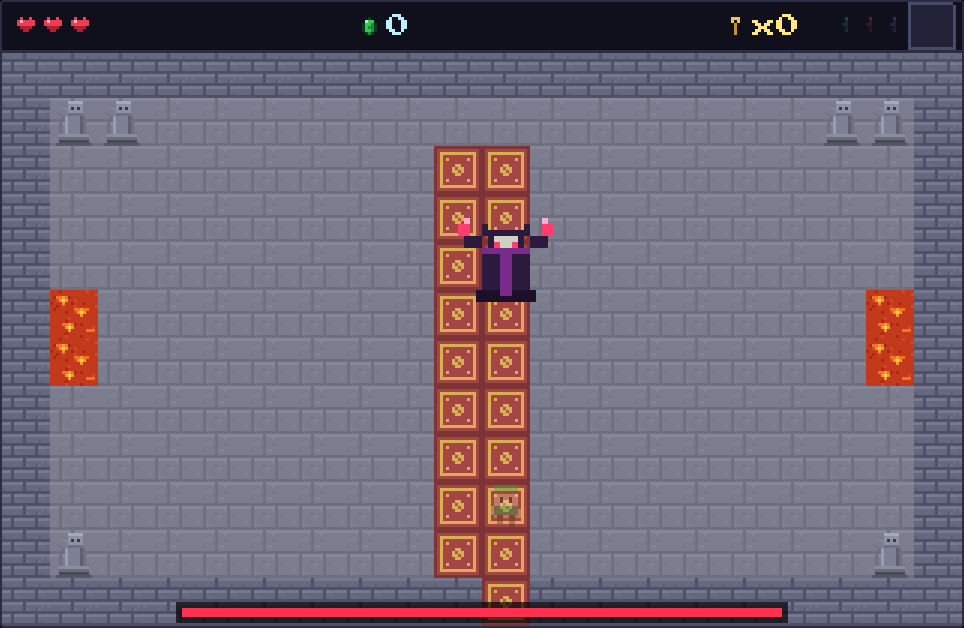
PHASE 1 — the wizard duel. He blinks, he barrages, he gloats.
Morgrath fights like his wizards, only meaner: teleport, barrage,
rest, repeat. The rhythm is your friend. When he materializes, he needs
a moment to wind up — that moment belongs to your blade. Two clean hits per
window, then break away before the bolts fan out. Keep your hearts above
half: phase one is a warm-up, and you want to enter what's next strong.
PHASE TWO — THE DEMON
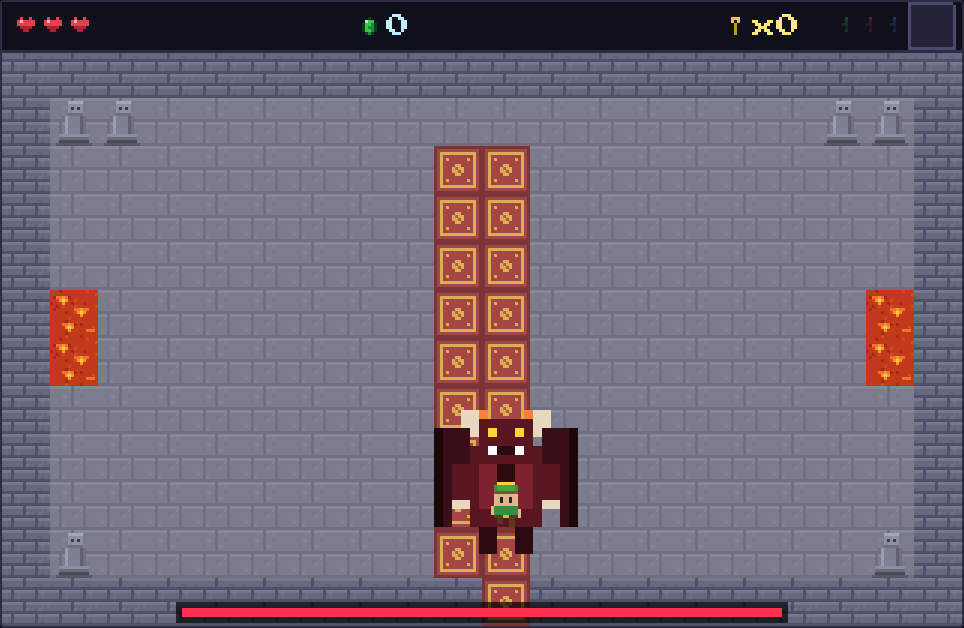
HE WASN'T KIDDING ABOUT THE FORBIDDEN MAGIC. 26 HP of doom.
Drop the sorcerer and the throne room shakes... and what stands up
is no longer a man. Demon Morgrath fills the room: fireball fans,
charging rushes that crack the floor, and bat swarms when his
health runs low. The plan:
- Charges: he crashes like Bramblehorn — sidestep and slash the
recovery. Old tricks beat new demons.
- Fireball fans: the gaps are generous. Walk — don't panic-run —
through them. Boots help.
- Bats: kill them THE SECOND they appear, or they'll nickel-and-dime
your potion stash away.
- Potions: drink at 2 hearts. A held potion heals zero damage.
When the last hit lands, the darkness peels away, the Crown reforges, and
Eldoria gets its sky back. You did that. Roll credits, hero — and
yes, your save keeps going afterward, with every secret still out there to
find.
TALES OF ELDORIA
They say the throne room's carpet runs the exact path the first heroes
walked to place the Crown. Morgrath kept it. Even monsters miss being
part of a better story.
★ CLASSIFIED ★ TOP SECRET ★ NO PEEKING ★
THE GOLDEN ACORN REGISTRY
Twelve Golden Acorns hide across Eldoria. NUTWICK PAYS:
4 acorns → 100 gems. 8 acorns → HEART CONTAINER. All 12 →
the OAK CHARM (all damage halved, forever). Here is every single one.
You're welcome.
| # | WHERE | HOW |
|---|
| 1 | North meadow bluffs (NW of the village) | Tucked in a bush pocket — cut your way in |
| 2 | South fields, far SE corner | Behind the farm rows |
| 3 | Forest, NW alcove | Bush-sealed nook by the gem chest |
| 4 | Nutwick's own grove | Right under his nose. He counts them. Do it anyway |
| 5 | Forest gem cave | BOMB the boulder in the SE forest, acorn inside the cave |
| 6 | Lake NW shore | Bush cluster near the reeds |
| 7 | Lake bridge island | Cross the bridge to the island's heart |
| 8 | Frostpeaks, NW ledge | Bush-sealed snowy shelf |
| 9 | Frostpeaks, NE nook | Near the 20-gem chest peak |
| 10 | Deep swamp island (SW corner of the world) | Wade the shallows south |
| 11 | NE desert | Behind the cactus line |
| 12 | SW dunes | Pocket in the rocks near the desert road |
PRO TIP
The HUD doesn't track acorns — the PAUSE screen does (ENTER). Found
one? It's saved forever the moment you grab it.
THE HEART CONTAINER TRAIL
Beyond the three boss hearts, FOUR more await:
- Mountain cave: bomb the cracked boulder in the far NW corner of
the Frostpeaks.
- Desert cave: bomb the boulder in the desert's far SE corner.
- Lake cave: the ONLY cut-secret in Eldoria — a bush on the lake's
south shore hides a staircase. Slash everything green.
- Citadel alcove: bombable wall in the torch room (page 13).
- Nutwick hands over one more at 8 acorns!
Collect everything and your life bar hits 11 hearts. Morgrath
will weep.
★ CLASSIFIED ★ THE DEEPEST SECRET ★
THE SUNKEN SHRINE & THE HERO'S BLADE
Witch Morla's riddle is real. South-west through the swamp — wade the
shallows, mind the deep water — ancient stones rise from the mire. The
staircase between them sinks into the SUNKEN SHRINE, the one dungeon
no quest requires... and the one every hero should finish.
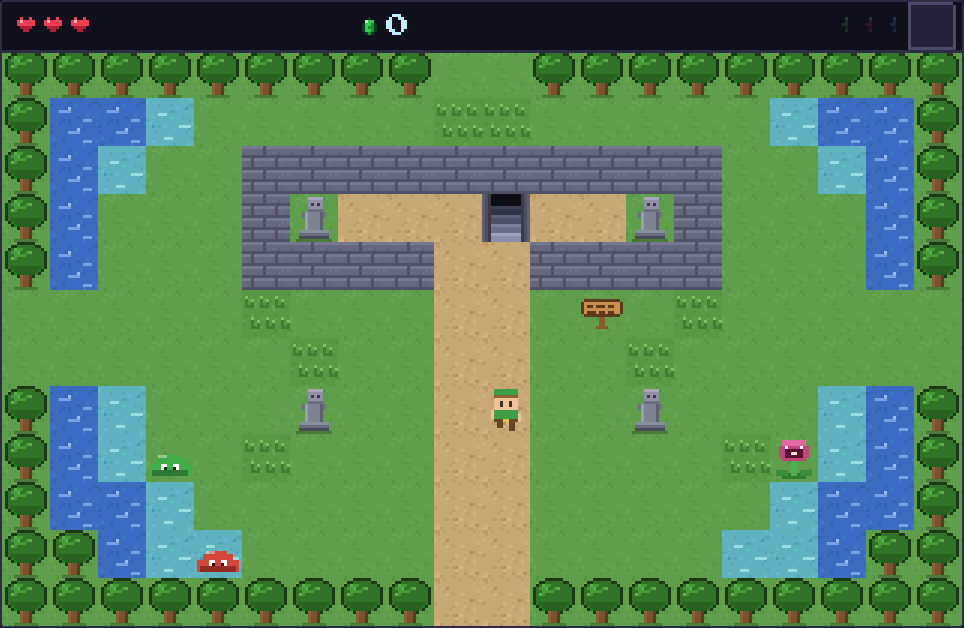
OLD STONES DREAM BELOW THE MIRE. Bring your lantern — only its light wakes them.
ALL FOUR ROOMS — small dungeon, giant reward.
- Antechamber: block on the plate AND both torches lit (lantern!)
opens the north door.
- Drowned cellar (east, optional): clear the fight for 50 gems.
- Hall of echoing lights: two block-plates, one torch. The east
door grinds open.
- The arena: BOG LURKER. Swing where it surfaces. Its
treasure: the HERO'S BLADE — double damage on every swing,
forever.
MORE CLASSIFIED INTEL
- Fairy ponds (lake NE + desert oasis): walk into the water,
leave with full hearts. Free. Reusable. The pros plan routes around them.
- Gem caves: bomb-boulders in the central meadows and SE forest
each hide a 50-gem chest (the forest one has acorn #5!).
- Wastes caches: 50 gems in the NW ruin pocket; FIVE bombs in the
NE — restock before the Citadel without walking home.
- Chest patrol: 20-gem chests hide in the meadow bluffs, the south
hollow, the forest nook, the lake cove, the peaks and the swamp; 50-gem
chests in the SW forest and east desert; an arrow cache sits in the
north desert. Our world map shows the regions — happy hunting!
- Dungeon 1 revisit: that cracked wall in Vinewood's SE room?
50 gems say you came back with bombs.
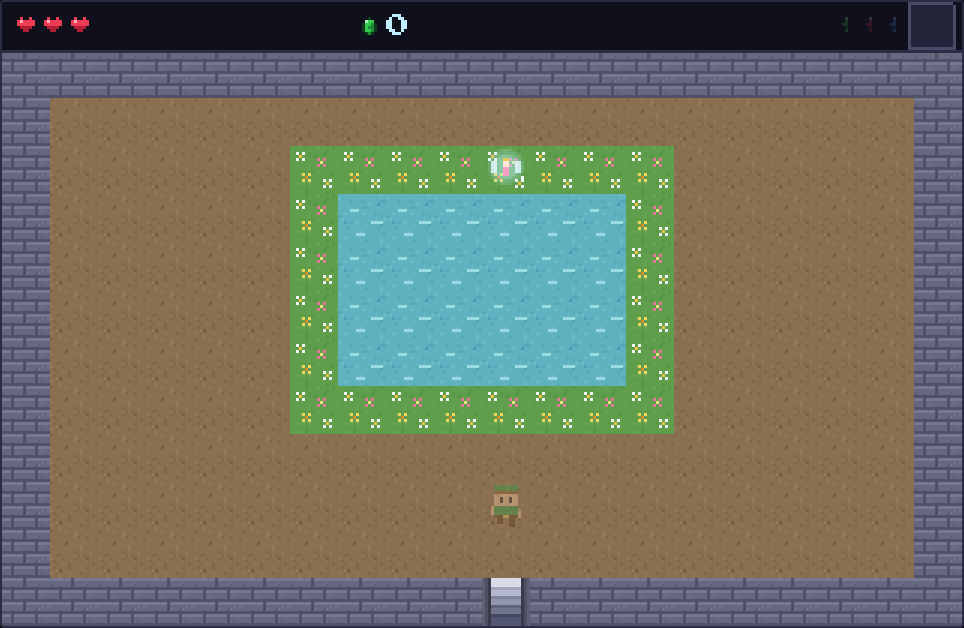
FAIRY ARIA'S POND — "Rest, little hero. The water remembers you."
FOR 100% HEROES ONLY
THE COMPLETIONIST'S CHECKLIST
| ✓ | DEED |
|---|
| ☐ | Emerald Shard (Vinewood Temple) |
| ☐ | Ruby Shard (Sandstone Ruins) |
| ☐ | Sapphire Shard (Glacier Hollow) |
| ☐ | Hunting Bow • Bomb Bag • Lantern • Power Boots |
| ☐ | HERO'S BLADE from the Sunken Shrine |
| ☐ | All 12 Golden Acorns |
| ☐ | Oak Charm (Nutwick, 12 acorns) |
| ☐ | All 7 bonus Heart Containers (11 hearts total) |
| ☐ | Every cracked wall bombed (D1 revisit too!) |
| ☐ | Both fairy ponds discovered |
| ☐ | Talked to every single villager after the ending |
| ☐ | MORGRATH DEFEATED — CROWN REFORGED |
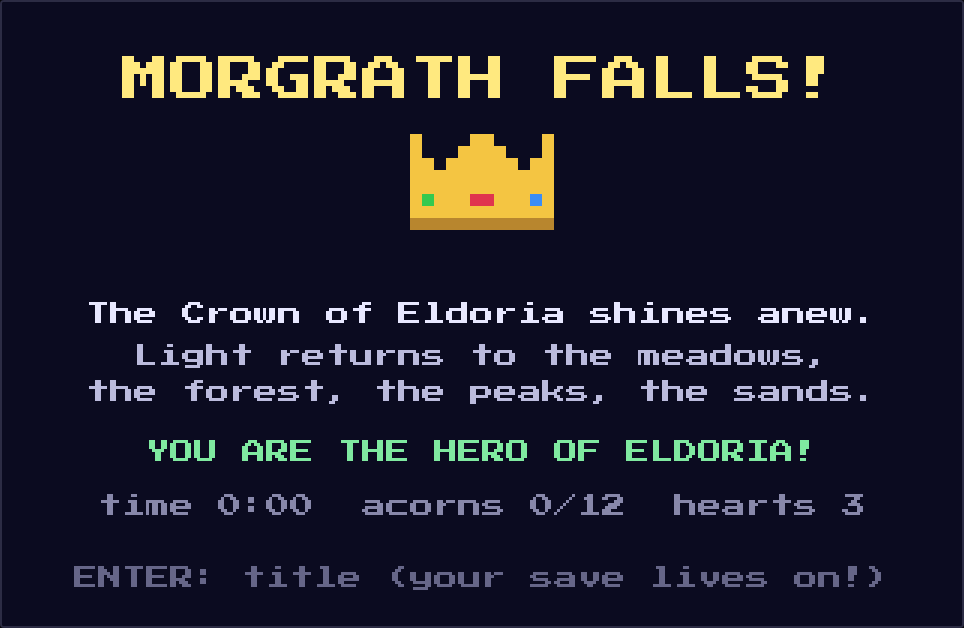
THE ENDING — your time, your acorns, your hearts. Frame it.
98% — "AN INSTANT CLASSIC" — ELDORIA WEEKLY
"I have reviewed kingdoms, festivals, and one
unusually ambitious turnip. This quest outranks them all."
— Pip, age 7, Willow Village Gazette
"The boulder. THE BOULDER. Twenty years!" — Hermit Aldous, five stars
"Chit-chit. CHIT-CHIT-CHIT!" — His Royal Fluffiness King Nutwick,
translated from the original Squirrel
UNTIL NEXT TIME
Some say that on quiet nights, the reforged Crown hums an old song — and
that far beyond the eastern lake, something hums back. But that, brave
hero, is a legend for another day...
THE SHATTERED CROWN — OFFICIAL PLAYER'S GUIDE • MADE WITH ❤ FOR ONE BRAVE
HERO • PLAY MORE GAMES WITH YOUR DAD